Skill Level: Beginner

Tools & Supplies to Make It:
- MySawgrass+ Membership
- Sawgrass SG500 or SG1000 Printer
- Flat Press
- “8.5×11” or larger sublimation paper
- Pickleball Paddle
- Alcohol and a lint free cloth
- Heat Tape
- Blowout Paper
How to Create It:
- Log into MySawgrass and from the Landing Page choose Design.
- For your product, select the Pickleball Paddle. It can be found under Accessories.
- On the Create Your Design Panel, click on Elements and then Backgrounds.
- Next, click on Patterns.
- Click on the filter icon and then select Plaids and Stripes and click apply.
- Choose the Bright_Stripe_02 background and hit done.
- You can adjust the size of the pattern by scrolling to the bottom of the left panel. We adjusted the size to 9.
- When finished, make sure to click done.
- Go back to the main menu and then to Elements and then Shapes.
- From the Speciality shapes choose the wavy circle.
- The shape may need to be shrunk or moved, use the resize icon to change the size and then the move icon to relocate it.
- On the left panel, click on Colors and change it to Hex Code #3F69B9.
- When finished, make sure to click done.
- If you do not want an outline around the shape, click on the second color, which is the stroke, and click Remove.
- When finished, make sure to click done.
- To add a Monogram, choose Fonts from the Create Your Design panel.
- In the text box on the left, type the needed Initials.
- From the pull down menu, choose the font Westmeath, click on the Fill Color and use Hex Code #8EC5BB. When you are finished, make sure to click done.
- When your design is finished, hit the Print button to send your job to the Sawgrass Print Utility.

How to Print It:
- You should get a popup that asks if you want to open Sawgrass Print Utility. You will need to click Open Sawgrass Print Utility. If you are not seeing this, you’ll need to disable your popup blocker.
- In the Sawgrass Print Utility, start by scrolling down and making sure your print orientation is set to Portrait.
- For this project, you can use the preset Hardboard Coaster.
- Make sure that the media size and type match what you have in the printer.
- You can use spacing under Design Files to move the images further apart.
- On the Color Management Tab, we suggest having the Color Mode set to Vibrant.
- To press the same design on both sides of the paddle, scroll down to pages and change the number of copies to 2.
- When you’ve confirmed all of your settings, Hit Print.
How to Press It:
- Turn your press on and set the temperature to 385 degrees Fahrenheit and the time to 225 seconds.
- Prepare your paddle with a lint free cloth and alcohol to remove any fibers or fingerprints.
- Place your design face down on the paddles and tape it down.
- Place the paddle on the lower platen of the press with the printed page on top.
- Place a piece of blowout paper on the bottom and top.
- Close the press and wait 225 seconds before opening the press and removed the printed pickleball paddle.
- Once slightly cool, flip the paddle over and repeat the steps to press the other side.

Tips & Tricks:
- If you are pressing something that has an uneven surface, like you would with the handle, try to keep the portion not needing sublimation out of the press. If this is not possible, use a silicone pad to ensure you have a flat, and even, pressing surface.
- For the 2nd side of the paddle, you can change the design slightly by using the pattern and not the monogram. You can do this by using the “Copy Design feature in the top panel of DesignMate.
Skill Level: Beginner

Tools & Supplies to Make It:
- MySawgrass+ Membership
- Sawgrass SG500 or SG1000 Printer
- Tumbler Press
- 8.5”x11” or larger sublimation paper
- 25oz Stainless Steel Water Bottle
- Denatured Alcohol and a lint free cloth
- Heat Tape
How to Create It:
- Log into MySawgrass and from the Landing Page choose Design.
- For your product, select the 25oz Stainless Steel Tumbler with widemouth and black portable straw lid. It can be found under Drinkware.
- On the Create Your Design Panel, click on Designs. Click on the filter icon and then select Outdoors and click apply.
- Click More and choose the Adventure Awaits design.
- Use your mouse as a lasso and select all pieces of the design and then use the move icon to slide it to the water bottle photo on the left.
- Center it in the area.
- Select the image and in the box that opens, click on the color and change it to white, hex code #FFFFFF. Make sure to hit done.
- Do the same thing for the text, changing the color to #FFFFFF.
- Click the Duplicate icon on the right panel and move the copy into place on the right side using the move icon.
- On the Create Your Design Panel, click on Elements and then Backgrounds.
- Next, click on Patterns.
- Click on the filter icon and then select Photography and click apply.
- Choose the Forest Treetops background and hit done.
- You can adjust the size of the pattern by scrolling to the bottom of the left panel. We used the Exact Fit option
- When finished, make sure to click done.
- When your design is finished, hit the Print button to send the job to the Sawgrass Print Utility.

How to Print It:
- You should get a popup that asks if you want to open Sawgrass Print Utility. You will need to click Open Sawgrass Print Utility. If you are not seeing this, you’ll need to disable your popup blocker.
- In the Sawgrass Print Utility, start by scrolling down and making sure your print orientation is set to Landscape.
- For this project, you can use the preset Stainless Steel Tumbler.
- Make sure that the media size and type match what you have in the printer.
- On the Color Management Tab, we suggest having the Color Mode set to Vibrant.
- When you’ve confirmed all of your settings, Hit Print.
How to Press It:
- Adjust your tumbler press to fit snuggly around the 25 oz water bottle.
- Turn your press on and set the temperature to 375 degrees and the time to 60 seconds.
- Prepare your tumbler by using denatured alcohol on a lint free cloth to remove any dust or fibers.
- Wrap your design around the cup and tape it tightly in place with heat resistant tape.
- Place the cup in the heat press and close.
- After 60 seconds, rotate the tumbler and press for another 60 seconds.

Tips & Tricks:
- It is easiest to remove the paper from the tumbler if you do it as soon as it is pressed. If it does stick, the paper can be washed off with warm water.
- Make sure to remove any accessories like lids when pressing tumblers. If there are plastic portions to the top that cannot be remove, make sure they are sticking out of the press to avoid melting.
One of the most heart stopping moments in sublimation is when you remove the sublimation paper after pressing and see the final result. There is nothing more heart dropping than when the results were not what you expected! Don’t worry – we have some tips to get to the bottom of the issue!
Whenever you have color issues, the first place to start is with a nozzle check. You want to isolate as quickly as possible whether the issue starts with the sublimation printer, or whether it falls somewhere else. A nozzle check will show you whether missing nozzles are your culprit. Nozzle checks can be printed from your Devices tab in your Sawgrass Print Utility Settings. Just select your printer on the Devices tab, and then click on the printer utilities. You’ll then click on the nozzle check icon to print it. Just a note, since the nozzle check will not get pressed, you can use regular copy paper instead of sublimation transfer paper.
You can also print your nozzle check directly from your Sawgrass printer. Just click the menu button, use the arrow keys to get to printer features and hit ok, then navigate to list/test print and hit okay, and then hit okay on nozzle check pattern.
When your nozzle check is printed, what you’re looking for is breaks, or areas where the lines are missing. What you should be seeing is a roughly equal number of boxes for each of the four colors. If you see any gaps, whether it be one missing box or multiple boxes missing for a color, that would show clogged nozzles.
If your nozzle check has misses, which we call breaks, you’ll do a head clean. You can find this in the same areas where you found the nozzle check in both PrintMate and on the printer. You only need to clean the side of the head that has the breaks; if this issue is black or cyan, you only clean those channels. If you only have an issue with yellow or magenta, you only clean those channels. Once the clean finishes, we suggest running one more and then doing another nozzle check. If the nozzle check is now good, your issue should be resolved, and you can return to printing! If you are still missing boxes on the nozzle check, this is a good time to reach out to us at care.sawgrassink.com. We have several other steps we can take to assist you with those clogged nozzles!
But what if you have color issues and your nozzle check is good?
There are a few things you can check that are easy fixes:
- Are you using the Sawgrass Print Utility? You should never be printing straight to your SG500 or SG1000. You should be sending your files to our print utility, or our legacy print management tool. One of the main benefits of using our print management tools is that we have created color profiles for every combination of settings you may use. That way, you are getting consistent, and accurate, colors every time.
- Are you using a quality sublimation blank? The best place to start when purchasing supplies is a certified dealer. You can use the dealer locator at sawgrassink.com. You want to make sure that your blanks are intended for sublimation. If you are sublimating onto fabric, a high polyester count is important. Another thing to remember is the substrate can impact the colors you are getting. If you print on a blank that is a color, like say a gray t-shirt, your colors will be impacted by the shirt color. That would make faces a bit more green or gray. We often hear comments about colors being muted on frosted glass, this is because of the frosted glass. You will get colors that are more washed out because of the transparency of the glass.
- Check your heat press. Are the time, temperature, and pressure that you are using correct? We’ll include a heat press setting chart with this article for you to use for reference. You’ll also see one soon in the Sawgrass Print Utility for quick reference. While these are general recommendations, the best place to look for settings for your specific product blank. These are often found in the product listing on your dealer’s site. Slightly adjusting any of the three can impact color.
- If the issue is that your color is inconsistent, the press is most likely the culprit. As a test, use some 100% polyester fabric and do a press that takes up most of the press area. Are there any spots where the colors are faded or aren’t pressing fully? That could indicate that area of the press isn’t reaching the correct temperature.
- Sometimes, the issue is the artwork. Is the image high quality? If you print the image on a standard printer, are you colors similar to what you are getting after pressing your image printed on your Sawgrass printer? If so, it may be the colors used. This would be a time to play with the color sliders or even spot color functions in the Sawgrass Print Utility. You can find blogs on these features here on our site.
If none of these suggestions improve your color output, it’s time to reach out to the Sawgrass Care Team. Our support team will be glad to assist whether that be doing a remote session where they observe your screen to check settings or getting your design file and testing the results here to see what suggestions we have. If you go to care.sawgrassink.com, you’ll find other tips on color output and can start a ticket or chat with our team!
Valentine’s Day is just around the corner, and what better way to express your love than with a customized Travel Mug? Join us as we delve into the world of sublimation printing with Sawgrass technology, turning ordinary mugs into heartfelt keepsakes. The warmth of coffee, coupled with a personalized touch, makes for a thoughtful and practical Valentine’s Day gift.
With MySawgrass, designing and customizing trendy gifts becomes a breeze – in just a few clicks, and you’re on your way to creating something truly special. In this walkthrough, we’ll guide you through the process of combining and customizing multiple designs, adding photos to pre-made frames, and transforming a blank canvas into a personalized masterpiece.
From the initial design phase to the big reveal, we’ll be with you every step of the way, ensuring your Valentine’s Day Travel Coffee Mug turns out perfect.
Note: While this tutorial showcases oven sublimation, you can also use a mug press for equally stunning results. Find additional tips below for mug press pressing instructions to make your crafting experience even smoother. Let’s dive into the world of personalized gifts and Sawgrass Sublimation!
Skill Level: Intermediate
Tools & Supplies to Make It:
- MySawgrass+ Membership
- Sawgrass SG500 or SG1000 Printer
- JPEG or PNG photo of your loved one
- Convection Oven
- Shrink Wrap
- 8.5”x11” or larger sublimation paper
- 12 oz. Stainless Steel Coffe Cup
- Denatured Alcohol and a lint free cloth
- Heat Tape
- Oven mits
- Tumbler cradle (optional)
- Mug press (optional)
How to Create It:
- Log into MySawgrass – if you don’t already have a DesignMate+ subscription, use the code LOVE30 and get 30% off your first month. Click Here to sign up.
- Once logged in, click “Design”.
- For product select 12oz. Stainless Steel Coffee Cup. It can be found under Drinkware.
- On the “Create Your Design” panel, click “Designs.”
- Click filter and select Valentine’s Day.
- Click the “more” link, then scroll until you see “Te Amo” design.
- You can use whatever design you’d like here.
- Select the image that is now in your template and use the hot keys Ctrl+X or right click on the design to “cut” the design.
- Click the back button and click “Designs” again.
- Filter to “Photo Frame”
- Click the “more” link and select the frame you would like to use.
- Click outside the template and drag to select all the design elements.
- Use the move tool (arrows that intersect) to position the design where you want it on the mug.
- You can also use the resize icon (a white right angle) to fit to your preference.
- Click anywhere outside the red box to deselect.
- Select “Background” with a little trashcan at the top of the screen.
- Use hotkeys control V (CTRL+V) or right click inside the template once more to paste the design from step 5.
- Select the design and use the position and size tools to your preference.
- Click on the grey photo image, select “Replace Image” in the pink square on the left panel.
- Select your image, then click “Open”
- You can use the “Image Position and Size” tools in the left panel to move and resize your image to your preference.
- Select the white frame around the image.
- Note: You may have to move the image layer to get to the white frame.
- In the left Panel, click the square of the color you want to change. You can choose from one of the color swatches below, click and drag in the color bar or use Hex, RGB or CMYK codes to choose a color of your preference.
- When your design is finished, you can:
- Save & Print to move to the product details page.
- Print directly from the design tool. This button will also allow you to create a proof of your project.
How to Print It:
- You should get a popup that asks if you want to open Sawgrass Print Utility. You will need to click Open Sawgrass Print Utility. If you are not seeing this, you’ll need to disable your popup blocker.
- In the Sawgrass Print Utility, start by scrolling down and making sure your print orientation is set to Landscape.
- For this project, you can use the preset Stainless Steel or Tumbler.
- Make sure that the media size and type match what you have in the printer. On the Color Management Tab, we suggest having the Color Mode set to Vibrant.
- When you’ve confirmed all settings, select Print.
How to Press It:
- Turn your press on and set the temperature to 385F degrees and the time to 420 seconds/7 minutes.
- Prepare your tumbler by using denatured alcohol on a lint free cloth to remove any dust or fibers.
- Wrap your design around the cup and tape it tightly in place with heat resistant tape.
- Place the cup in a shrink wrap sleeve and use a heat gun to create pressure.
- Note, you may have to cut the sleeve to fit around your substrate. Be sure to tape the shrink-wrap so it stays in place around your mug once it starts to shrink.
- Place your item in the oven.
- Close the door and wait 420 seconds before opening the oven and removing the mug.
Tips & Tricks:
- For a more cohesive look match your colors! Select the color from one design, copy the hex code. Select the similar color in the other design and paste the hex code in the box.
- For items in the convention oven, remove the shrink wrap and paper as soon as possible. This makes it easier to remove and less likely to stick.
- This can also be done in a mug press: 385*F for 120 seconds.
New Functionality Added to Custom Canvas
Previously, you would have to go to the Product Detail page for all Print and Save functionality within MySawgrass. That changed recently when we added s print button within the design tool itself. We added this feature to the MySawgrass design tool a few weeks ago for when you are using a product template. You will now see this option available within Custom Canvas as well. From the new print button, you can print, and you can also print a proof. Below, we’ll take a look at the new functions!
Exploring the Print Button in Custom Canvas
The addition of a Print Button within the design tool is a time saving feature. Previously, whether you were printing or saving, you’d have to the product detail page. Being able to print from the design tool saves time and clicks! While this has been present when using product templates for a few weeks, it was just added to custom canvas. Once you have set up your custom canvas and added your design, you can hit print to send it to the printer. Save canvas will take you to the Product Detail page to add a name and description before saving to my studio.
Print Preview Functionality Also Added
Another new function you will see can also be found under the print button in the design tool. Once you click on the button, you’ll have two options; you can print your project, or you can print a print preview. The print preview is a PDF file that serves as a proof of your print project. This can be printed and shared with your customer for them to approve. You can also print the proof or save it so you have a record of everything you’ve created. This can also serve as a great place to save pressing instructions if you print the project again in the future!
We hope these features are a great enhancement to your experience in the MySawgrass design tool. Keep an eye on the blogs for further updates as we add more features to MySawgrass!
Love is in the air, and we are absolutely head over heels for the latest collection of Valentines designs from our Featured Artist, Sabine Allen, the artistic talent behind Chameleon Cuttables.
We recently sat down with Sabine to learn more about her design process and passion to live creatively. Keep reading for more on her passions, inspirations and design process and get access to her beautiful designs over in DesignMate!
How did you discover your talent for design?
I think I was born with the desire to create. I started drawing, painting, and crafting at a very young age. By the age of 6 or 7 I knew I wanted to become a graphic designer.
What would we find you listening/watching while creating?
I love listening to music while I create. I love all types of music, depending on my mood. I can’t seem to focus on a movie or anything else while I’m creating, I’m too emerged in the process. I actually enjoy the feeling of being “zoned out” and in the moment. I do my best “work” when I’m in the flow state.
What’s your personal favorite thing to craft?
My favorite craft since I’m a little kid is working with polymer clay. My kids love it too. Crafting together with them is the best! Being able to share my passion with them brings me so much joy.
Any tips for breaking through a creative block?
Hands down, going on a walk or hike in nature. It takes me out of the “thinking mode” into a more receptive and “creative mode”. I believe the best ideas come to us without effort. Overthinking is blocking creativity.
Where do you find inspiration for your designs?
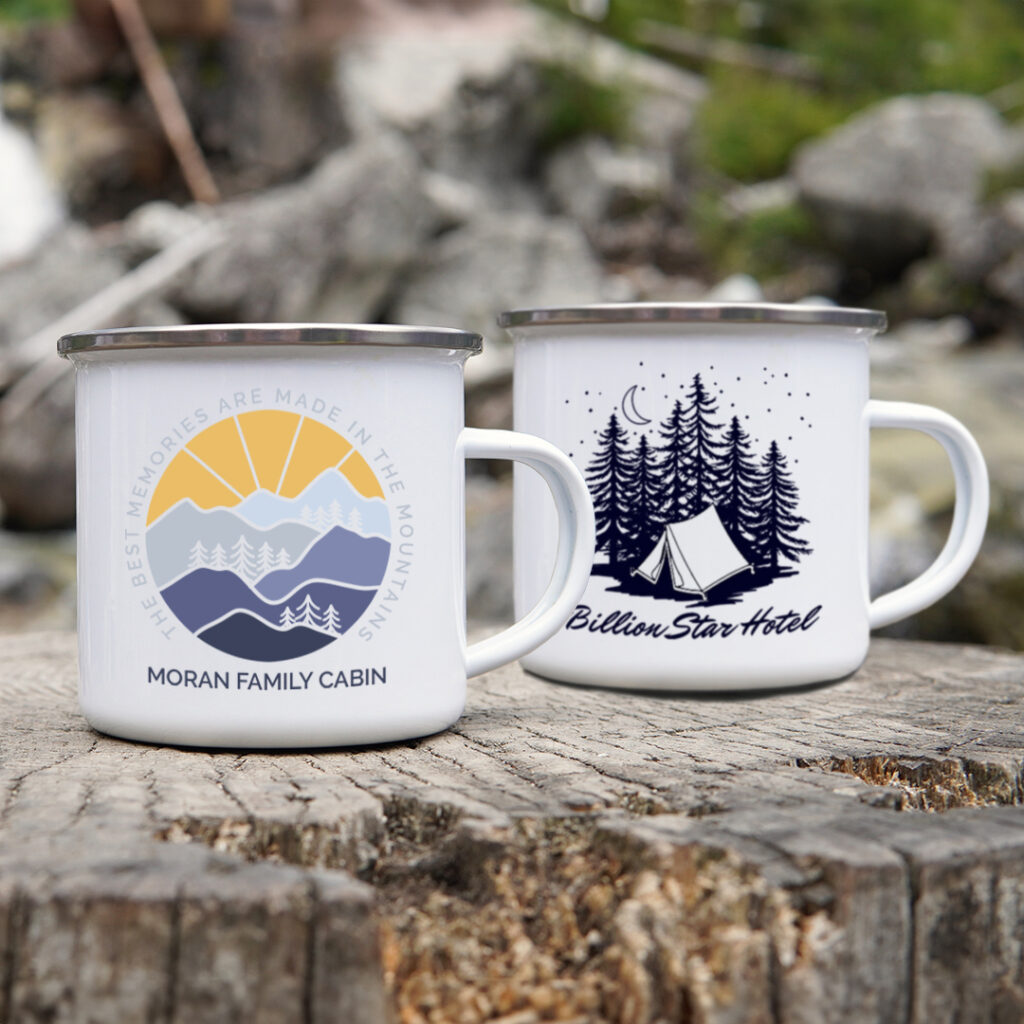
My inspiration usually comes from the things that I enjoy like nature, animals, etc.
You have been creating designs for Sawgrass for several years. What are some of your favorites?
That’s a tough question because I truly enjoyed creating all of them! But I guess if I had to pick, it would be the outdoor related ones.
What sublimation products do you think your designs work well on?
I personally enjoy sublimating mugs and tumblers but my designs work well on most sublimation products.
What do you think makes the Sawgrass Printer stand out?
I have had my Sawgrass Printer for several years and I love that it’s reliable. Working with a high-quality product makes the craft process a lot easier and hassle free. I’m a bit of a perfectionist and I want to have the best possible, vibrant, and crisp print so my end result is perfect.
What is one tip you would give someone who is just starting out with sublimation, designing, and crafting in general?
Allow yourself to play and have fun! Try different mediums like shirts, tumblers, coasters, etc. and see what brings you the most joy.
Thank you for your time today! If our viewers wanted to see more of your content, where can they find you?
Thank you for connecting with me and my work. I feel very honored if someone chooses one of my designs to create with! It’s you who brings my designs to life! You can find my full collection at www.chameleoncuttables.com
You can use Sabine’s art in DesignMate right now and as a special Valentines gift we’re giving you access to all her premium designs (and SO much more) with the code LOVE30 for 30% off the first month your DesignMate+ membership.
Hey y’all! Galentine’s Day is just around the corner, and what better way to celebrate your favorite booktalk bestie than by crafting a cute bookmark together? Today, we’re going to guide you through the process using MySawgrass on SawgrassInk.com, specifically diving into the wonderful world of Custom Canvas.
First things first, head over to the MySawgrass design tool on SawgrassInk.com. Today, we’re exploring Custom Canvas, where the magic happens. These bookmarks, brought to you by our friends at Conde, are 1.5 inches wide and 5 inches tall – the perfect size for your literary companions.
Now, let’s dive into the creative process. MySawgrass is regularly updated with templates of your favorite substrates, but for those moments when you can’t wait to personalize a new substrate that’s not in the tool yet, it’s your go-to tool. Click “Design Your Canvas” and let the crafting adventure begin.
Here’s a pro tip: these bookmarks have rounded tops, so ensure your designs are in the right places. Head into elements, select shapes, and find that arch shape that’ll serve as your perfect template. Ready? Let’s resize it. Oh, but wait! What if we want to make our canvas a bit bigger to avoid design mishaps during pressing? No worries – Custom Canvas lets you edit on the fly without starting from scratch. Just go back to the Custom Canvas button and edit away.
Make your canvas slightly larger than the bookmark itself – I’m thinking 2 inches wide and 5.5 inches tall. Now, adjust your template accordingly. It’s all about working smarter, not harder.
Okay, let’s talk about design placement. Worried about replacing existing elements? Fear not! Cut (ctrl x) the element on your canvas, head over to designs, pick your new design, and paste (ctrl v) the original back in place. Easy peasy.
To get a clear view, move your shape template to the back. Layer it down until it’s in the perfect position. Now, one of the best features of the design tool – changing up the text. Give your bookmark a personal touch by adding words of affirmation for your bookie bestie.
The bottom of your bookmark looks fantastic! Now let’s add a few more details to bring it all together. I’m going to repeat this adorable heart element from our featured artist this month, Chameleon Cuttables (read more about her here). From free designs to premium works by artists around the world, MySawgrass and MySawgrass+ have a treasure trove of designs to choose from. Get 30% off your first month of your premium subscription today using code LOVE30!
Delete the shape template, and voila! Your bookmark is taking shape. But why stop there? Add one more element to emphasize your love for books. You can use something from the design library or upload your own art using the upload tool!
Save your canvas, name your design, and on the next page, choose to either save it to your store and then print or print and save later. Click print, select metal keychain in the Sawgrass Print Utility for easy color matching, and you’re all set to print.
Do the press thing, and there you have it – a bookmark that your booktalk bestie will cherish forever. Until next time, y’all! Happy crafting!
Skill Level: Advanced

Tools & Supplies to Make It:
- MySawgrass+ Membership
- Sawgrass SG500 or SG1000 Printer
- 15”x15” or larger Flat Press
- 11”x17” or larger sublimation paper
- Linen Pillow Case
- Lint Roller
- Heat Tape
- Blowout Paper
How to Create It:
- Log into MySawgrass and from the Landing Page choose Design.
- For your product, select the 15.75” Linen Pillow Cover. It can be found under Home Decor.
- This project does not start with a Design, but will be built from elements and text.
- On the Create Your Design Panel, click on Elements and then Graphics Library.
- Go to the filter and click on Spring Watercolor and hit apply.
- You will be adding multiple images. Start with the silver watering can, and then scroll down to add the greenery.
- You can choose any of the flowers to add.
- You will need to resize and arrange the Images by using the move and resize icons on each image.
- On the right side panel, you can move various elements backward and forward as you build your design.
- You can also use the arrows on the Layers panel to move items forward and backwards.
- You will need to resize, move, and rotate the image by using the move, rotate, and resize icons on each image.
- On the left menu, click on Fonts.
- Type the word Welcome in the left text box and choose the font Raustila. Make sure to hit Done to apply the changes.
- With the move and resize icons, size and place the new text on top of the Watering Can.
- On the left text panel, click on Fill Color. We used Hex Code #fb7e96. Make sure to hit Done to apply the changes.
- When your design is finished, hit the Continue button to move to the product details page.
- You’ll be prompted to name your design, put it in a Category folder, and then hit save.
- On the Product Detail page, you’ll give the project a name and add a description, then hit print.

How to Print It:
- You should get a popup that asks if you want to open Sawgrass Print Utility. You will need to click Open Sawgrass Print Utility. If you are not seeing this, you’ll need to disable your popup blocker.
- In the Sawgrass Print Utility, start by scrolling down and making sure your print orientation is set to Landscape.
- For this project, since it is fabric, you can use the preset Polyester T-Shirts.
- Make sure that the media size and type match what you have in the printer. T-shirts are set up for tabloid, but if you want a smaller design, set your paper size and then go to design files and click Fit to Paper Size.
- On the Color Management Tab, we suggest having the Color Mode set to Vibrant.
- When you’ve confirmed all of your settings, Hit Print.
How to Press It:
- Turn your press on and set the temperature to 385 degrees and the time to 45 seconds. Pressure should be medium.
- Prepare your pillowcase by using a lint roller to remove any fibers or dust.
- Place your design face down on the pillowcase and tape it down.
- Place the pillowcase on the lower platen of the press with the printed page on top.
- Place a piece of blowout paper on top.
- Close the press and wait 45 seconds before opening the press and removed the pillow.

Tips & Tricks:
- Getting lines on your fabric items? Ripping the edges of paper helps prevent those hard lines.
- Place blowout paper in the shirt to prevent any ink from accidentally getting on the back of the pillowcase.
- If your pillow case has a zipper, try to keep it outside of the press. If it has to be in the press, use a pressing pillow to protect it from the pressure.
- You can make your image smaller on the pillow if you are using an SG500 printer. The real limit here is your printer and your paper size.
Skill Level: Advanced

Tools & Supplies to Make It:
- MySawgrass+ Membership
- SG500 or SG1000 Printer
- 12 x 12 or larger flat press
- 8.5”x11” or larger sublimation paper
- Notebook
- Lint Roller
- Heat Tape
How to Create It:
- Log into MySawgrass and from the Landing Page choose Design.
- For your product, select the A4 Fabric Notebook. It can be found under School and Office.
- On the Create Your Design Panel, click on Designs. Click on the filter icon and then select Photo Frames and click apply.
- Choose the Make It Happen design.
- Click on the white boxes and then use the Move Icon to bring the box down.
- Repeat this process with the text boxes.
- To add text, click on Fonts in the left panel.
- In the text box type 2024.
- Change the font to Westmeath and hit done.
- Click on Fill Color and use Hex Code #446ab3.
- When your design is finished, hit the Save & Print button to move to the product details page.
- You’ll be prompted to name your design, put it in a Category folder, and then hit save.
- On the Product Detail page, you’ll give the project a name and add a description, then hit print.

How to Print It:
- You should get a popup that asks if you want to open Sawgrass Print Utility. You will need to click Open Sawgrass Print Utility. If you are not seeing this, you’ll need to disable your popup blocker.
- In the Sawgrass Print Utility, start by scrolling down and making sure your print orientation is set to Portrait
- For this project, since the cover is fabric, you can use the preset Polyester T-Shirt.
- Make sure that the media size and type match what you have in the printer. On the Color Management Tab, we suggest having the Color Mode set to Vibrant.
- When you’ve confirmed all of your settings, Hit Print.
How to Press It:
- Turn your press on and set the temperature to 390 degrees and the time to 60 seconds.
- Prepare your notebook by using a lint roller to remove any dust or fibers.
- Tape your image down to the notebook
- Place the notebook in the heat press and close.
- Wait 45 seconds before lifting the lid and removing the notebook.

Tips & Tricks:
- Make sure to wrap the print around the edges of the notebook to get print on the sides of cover.
- For inside of the cover, tape the paper to the paper instead of to the book itself to prevent damage to the book.
Skill Level: Intermediate

Tools & Supplies to Make It:
- MySawgrass+ Membership
- Sawgrass SG500 or SG1000 Printer
- 12”x12” or larger Flat Press
- Letter Size or larger sublimation paper
- Pot Holder
- Lint Roller
- Heat Tape
- Blowout Paper
How to Create It:
- Log into MySawgrass and from the Landing Page choose Design.
- For your product, select the Pot Holder with Pocket. It can be found under Kitchen and Dining.
- On the Create Your Design Panel, click on Designs. Search for Valentine_Love_Block and click apply.
- Use your mouse to lasso around the L and O to select them.
- Use the move icon on the pairing and place the letters in front of the other two.
- Use your mouse to lasso around all of the letters.
- With the move and resize icons, size and place your design. You can also use the center tools from the right menu to center the letters horizontally and vertically.
- On the left menu, click on Fonts.
- Type the words Made With in the left text box and choose the font Mama. Make sure to hit Done to apply the changes.
- With the move and resize icons, size and place the new text to the top left of the Love Design.
- On the left text panel, click on Fill Color. We used Hex Code #e92062. Make sure to hit Done to apply the changes.
- One the Create Your Design panel, go to Elements and then Backgrounds.
- When your design is finished, hit the Continue button to move to the product details page.
- We used Hex code #f1b4c4 for the background.
- You’ll be prompted to name your design, put it in a Category folder, and then hit save.
- On the Product Detail page, you’ll give the project a name and add a description, then hit print.

How to Print It:
- You should get a popup that asks if you want to open Sawgrass Print Utility. You will need to click Open Sawgrass Print Utility. If you are not seeing this, you’ll need to disable your popup blocker.
- In the Sawgrass Print Utility, start by scrolling down and making sure your print orientation is set to Landscape.
- For this project, you can use the preset Polyester T-Shirts.
- Make sure that the media size and type match what you have in the printer. T-shirts are set up for tabloid, but if you want a smaller design, set your paper size and then go to design files and click Fit to Paper Size.
- On the Color Management Tab, we suggest having the Color Mode set to Vibrant.
- When you’ve confirmed all of your settings, Hit Print.
How to Press It:
- Prepare your pot holder by using a lint roller to remove any fibers or dust.
- Place your design face down on the pot holder and tape it down.
- Place the pot holder on the lower platen of the press with the printed page on top.
- Place a piece of blowout paper on top.
- Close the press and wait 45 seconds before opening the press and removed the printed pot holder.

Tips & Tricks:
- Getting lines on your fabric items? Ripping the edges of paper helps prevent those hard lines.
- For thicker items like pot holders, remember to adjust the press before turning it on. You can place the item inside and adjust as needed to get a snug close before hitting the on switch.


