
Skill Level: Beginner
Tools & Supplies to Make It:
- MySawgrass+ Membership
- SG500 or SG1000 Printer
- Mug Press
- Mug Paper or larger sublimation paper
- 11oz Ceramic Mug with Heart Shaped Handle
- Denatured Alcohol and a Lint Free Cloth
- Heat Tape
How to Create It:
- Log into MySawgrass and from the Landing Page choose Design.
- For your product, select the 11oz Ceramic Mug With Heart Shaped Handle. It can be found under Drinkware.
- On the Create Your Design Panel, click on Designs. Click on the filter icon and then select Valentine’s Day and click apply.
- Choose the You are the One design.
- To resize the image, use your mouse to lasso around the images and select them all as a group.
- Then, use the resize icon on the group to reduce the size.
- Use the move icon to slide the design to left side of the mug.
- Use the duplicate button on the right panel to copy the design and place it on the right side of the mug.
- When your design is finished, hit the Save & Print button to move to the product details page.
- You’ll be prompted to name your design, put it in a Category folder, and then hit save.
- On the Product Detail page, you’ll give the project a name and add a description, then hit print.
How to Print It:
- You should get a popup that asks if you want to open Sawgrass Print Utility. You will need to click Open Sawgrass Print Utility. If you are not seeing this, you’ll need to disable your popup blocker.
- In the Sawgrass Print Utility, start by scrolling down and making sure your print orientation is set to Landscape.
- For this project, you can use the preset ceramic drink ware.
- Make sure that the media size and type match what you have in the printer. On the Color Management Tab, we suggest having the Color Mode set to Vibrant.
- When you’ve confirmed all of your settings, Hit Print.
How to Press It:
- Turn your mug press on and wait for it to heat up.
- Prepare your mug by using a lint free cloth and denatured alcohol to remove any dust or fibers.
- Tape your image down to the mug.
- Place the mug in the heat press and close.
- Once the press signals that it is complete, open the press and remove the mug.
Tips & Tricks:
- If you are doing multiples of a mug, you can repeat the image in the Sawgrass Print Utility to put two on one piece of paper.
- Ceramic mugs can also be pressed in a tumbler press.
Skill Level: Beginner
Tools & Supplies to Make It:
- MySawgrass+ Membership
- Sawgrass SG500 or SG1000 Printer
- 12”x12” or larger Flat Press
- 8.5”x11” or larger sublimation paper
- Sequin Pillow case
- Alcohol Wipes or Alcohol and a Lint Free Cloth
- Heat Tape
- Blowout Paper
How to Create It:
- Log into MySawgrass and from the Landing Page choose Design.
- For your product, select the 15.75” Flip Sequin Pillow. It can be found under Home Decor.
- On the Create Your Design Panel, click on Designs. Click on the filter icon and then select Throwback. Once selected, click apply.
- Choose the Club Disco design.
- The image may come in a little large, to reduce the image size, use your mouse to lasso around the images and select them all as a group. Then, use the resize icon on the group to reduce the size. It should stay centered.
- This design has a background that would fill the entire area. We would call this a full bleed design. If you are not able to print that large, you can remove the background to make the design smaller.
- At the top of your screen, hit the trashcan icon next to Background.
- Use the lasso method from above to select the entire design. You’ll see the dimensions across the top. Resize the image until the dimensions fit on the size of paper you have available.
- When your design is finished, hit the Continue button to move to the product details page.
- You’ll be prompted to name your design, put it in a Category folder, and then hit save.
- On the Product Detail page, you’ll give the project a name and add a description, then hit print.
How to Print It:
- You should get a popup that asks if you want to open Sawgrass Print Utility. You will need to click Open Sawgrass Print Utility. If you are not seeing this, you’ll need to disable your popup blocker.
- In the Sawgrass Print Utility, start by scrolling down and changing your print orientation to Portrait.
- We do not have a preset for Sequins, so make sure your settings are as follows.
- Under job settings, make sure mirror is clicked. Center on page will move the design to the middle of the paper.
- Your product should be metal and your print quality should be high quality.
- Make sure that the media size and type match what you have in the printer.
- On the Color Management Tab, we suggest having the Color Mode set to Vibrant.
- When you’ve confirmed all of your settings, Hit Print.
How to Press It:
- Turn your press on and set the temperature to 385 degrees and the time to 45 seconds. Pressure should be light to medium.
- Make sure that all the sequins have the white side up.
- If there are finger prints on the sequins, you can wipe those away with a lint free cloth and alcohol.
- Place your design facing up and then place the pillow on it and tape the two together with heat resistant tape.
- Place the pillow on the lower platen of the press with the printer page on top.
- Place a piece of blowout paper on top.
- Close the press and wait 45 seconds before opening the press and removed the printed pillowcase.
Tips & Tricks:
- Flip the sequins back and forth once or twice immediately after removing paper to keep them from sticking.
- If the design is not full bleed, make sure to keep the pillow zipper outside of the press so it isn’t damaged. If it needs to be in the press, a pressing pillow inside the case will help prevent damage.
- This is a great example of modifying a design to use with a large item like a pillow. Modifying a design allows you to print on pillows or tote bags even if you have an SG500.
Skill Level: Intermediate
Tools & Supplies to Make It:
- Sawgrass SG500 or SG1000 Printer
- Flat Press
- “8.5×11” or larger sublimation paper
- Stainless Steel Bottle Opener
- Alcohol and a lint free cloth
- Heat Tape
- Blowout Paper
How to Create It:
- Log into MySawgrass and from the Landing Page choose Design.
- For your product, select the Large White Stainless Steel Bottle Opener. It can be found under Kitchen & Dining.
- On the Create Your Design Panel, click on Elements and then Backgrounds.
- Next, click on Patterns.
- Click on the filter icon and then select Art Deco and click apply.
- Choose the Herringbone Tile background and hit done.
- You can adjust the size of the pattern by scrolling to the bottom of the left panel.
- You can change the pattern by toggling between tile and brick.
- Use the slider to adjust the size.
- When finished, make sure to click done.
- Go back to the main menu and then to Elements and then Graphics Library.
- Click on the filter icon and then select Vintage and click apply.
- Choose the letter B.
- The image may need to be shrunk or moved, use the resize icon to change the size and then the move icon to relocate it.
- Use these same steps to add A and R.
- If you’d like to add this design to both sides of the bottle opener, click on copy design on the top bar.
- On the window that appears, click Apply Design.
- When your design is finished, hit the Save & Print button to move to the product details page.
- You’ll be prompted to name your design, put it in a Category folder, and then hit save.
- On the Product Detail page, you’ll give the project a name and add a description, then hit print.
How to Print It:
- You should get a popup that asks if you want to open Sawgrass Print Utility. You will need to click Open Sawgrass Print Utility. If you are not seeing this, you’ll need to disable your popup blocker.
- In the Sawgrass Print Utility, start by scrolling down and making sure your print orientation is set to Portrait.
- Under Design Files, you can increase spacing to move the two images further apart. This will make the upcoming step of cutting them apart easier.
- For this project, you can use the preset Metal Keychain.
- Make sure that the media size and type match what you have in the printer.
- You can use spacing under Design Files to move the images further apart.
- On the Color Management Tab, we suggest having the Color Mode set to Vibrant.
- When you’ve confirmed all of your settings, Hit Print.
How to Press It:
- Prepare your bottle opener with a lint free cloth and alcohol to remove any fibers or fingerprints.
- Use scissors to cut between the two images so they are now on separate pieces of paper.
- We will do each side at a time.
- Place your design face down on the bottle opener and tape it down.
- Place the bottle openers on the lower platen of the press with the printed page on top.
- Place a piece of blowout paper on the bottom and top.
- Close the press and wait 60 seconds before opening the press and removed the printed bottle opener.
- Once slightly cool, flip the bottle opener over and repeat the steps to press the other side.
Tips & Tricks:
- With smaller items, it’s usually easiest to keep the paper larger than the bottle opener and tape the bottle opener to the paper instead of the paper to the product like you do with larger items.
- You can increase the number of designs by hitting repeat in the Sawgrass Print Utility and use spacing to print multiple bottle openers at once.
Skill Level: Intermediate
Tools & Supplies to Make It:
- MySawgrass+ Membership
- Sawgrass SG500 or SG1000 Printer
- Convection Oven
- Shrink Wrap
- 8.5”x11” or larger sublimation paper
- 16oz Tapered Stainless Steel Tumbler
- Denatured Alcohol and a lint free cloth
- Heat Tape
How to Create It:
- Log into MySawgrass and from the Landing Page choose Design.
- For your product, select the 16oz Stainless Steel Tumbler. It can be found under Drinkware.
- On the Create Your Design Panel, click on Elements and then Backgrounds.
- From Backgrounds, click on Patterns.
- Click on the filter icon and then select Holiday and click apply.
- Choose the Conversation Heart Background and hit done.
- You can control the size of the hearts on the vase by scrolling down on the patterns panel to the pattern options.
- Toggle between tile and brick to change the look of the pattern. We used brick.
- Changing the size will determine how large the hearts are and how many you see. We moved the slider to the right to get the larger hearts.
- When your design is finished, hit the Save & Print button to move to the product details page.
- You’ll be prompted to name your design, put it in a Category folder, and then hit save.
- On the Product Detail page, you’ll give the project a name and add a description, then hit print.
How to Print It:
- You should get a popup that asks if you want to open Sawgrass Print Utility. You will need to click Open Sawgrass Print Utility. If you are not seeing this, you’ll need to disable your popup blocker.
- In the Sawgrass Print Utility, start by scrolling down and making sure your print orientation is set to Landscape.
- For this project, you can use the preset Stainless Steel Tumbler.
- Make sure that the media size and type match what you have in the printer. On the Color Management Tab, we suggest having the Color Mode set to Vibrant.
- When you’ve confirmed all of your settings, Hit Print.
How to Press It:
- Turn your press on and set the temperature to 380 degrees and the time to 480 seconds.
- Prepare your tumbler by using denatured alcohol on a lint free cloth to remove any dust or fibers.
- Wrap your design around the tumbler and tape it tightly in place with heat resistant tape.
- Place the tumbler in a shrink wrap bag and use a heat gun to create pressure.
- Place your item in the oven.
- Close the door and wait 480 seconds before opening the oven and removing the tumbler.
Tips & Tricks:
- For items in the convention oven, remove the shrink wrap and paper as soon as possible. This makes it easier to remove and less likely to stick.
- For the vase, all we did was discard the lid. Though, you could give this as a tumbler and simply fill it with a box of conversation hearts and other treats to make it the perfect gift!
Tip 1: Keep the Jolly Juices (AKA Ink) Flowing
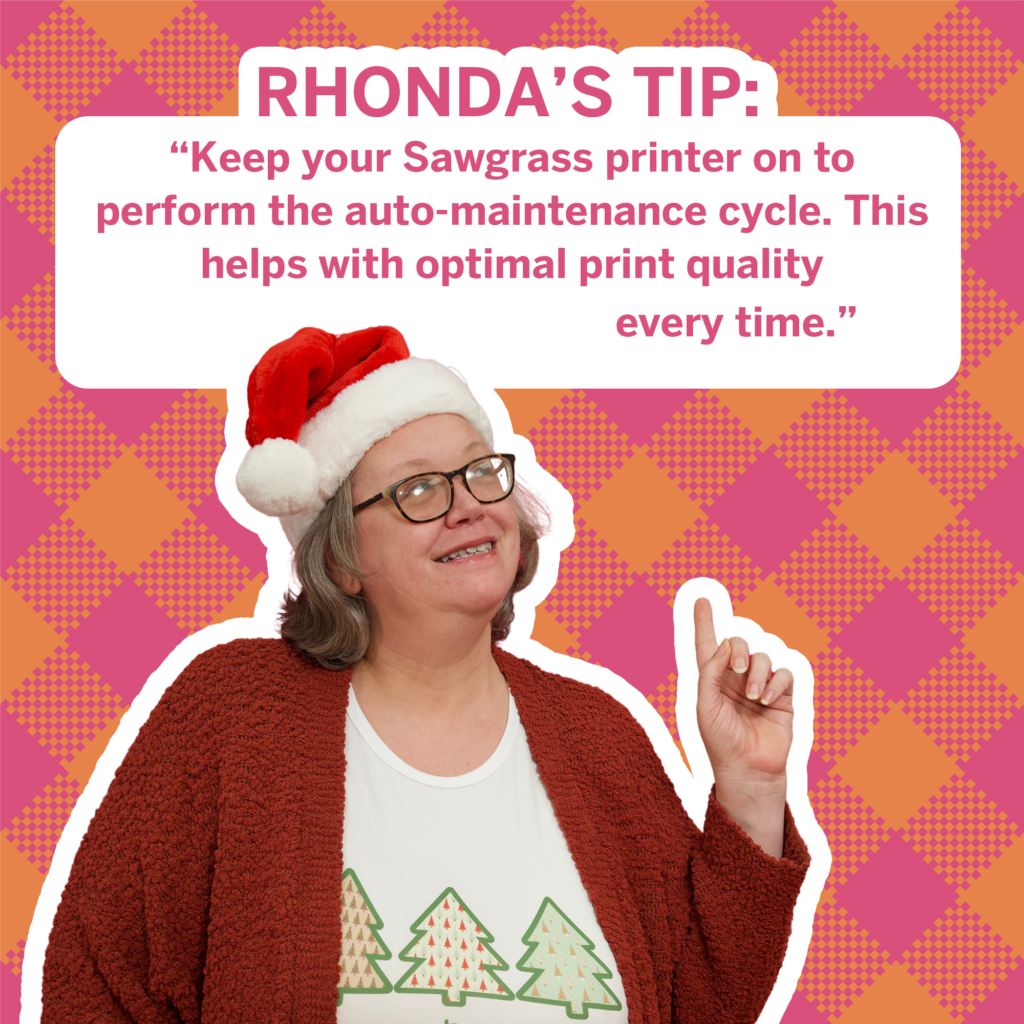
First and foremost, let’s talk printer TLC. You know that magic box that turns your creative visions into reality? Well, keep that Sawgrass printer turned on and connected to the wall. You don’t have to have it connected to your computer, but it does need to be powered on. Why, you ask? It’s all about the printer’s secret sauce – the daily maintenance cycle. Every 10 to 12 hours, it performs a self-maintenance cycle, pushing ink through the lines to prevent pesky clogs and ensuring your printer stays merry and bright. This is one of the main benefits of a Sawgrass Printer; these cycles help keep ink moving through the lines even when you’re not printing. This will prevent clogs and keep your printer humming along with no issues! So, let the holiday lights on your Sawgrass printer shine on!
Tip 2: Prep Like a Sublimation Santa
Now, onto prepping those blanks for sublimation magic. Start by picking up top-notch blanks from our stellar dealers – check out our website for more details on dealers near you. Whether it’s a shirt or a hard surface panel, give it the VIP treatment. Pre-press fabric items to get out any wrinkles or lines and then use a lint roller to remove any dust or fibers. For hard surfaces, a wipe-down with denatured alcohol and a lint free cloth will make sure there’s no unwanted debris. Don’t forget to peel that plastic! No one likes pressing with plastic on top – it’s the ultimate sublimation faux pas! If your blank has removable accessories like a plastic snap or lid, make sure to remove those before pressing. For attached items like zippers, keep them out of the press if possible. If you have to have them in the press, use a pressing pillow inside the product so the zipper is cushioned and not damaged.

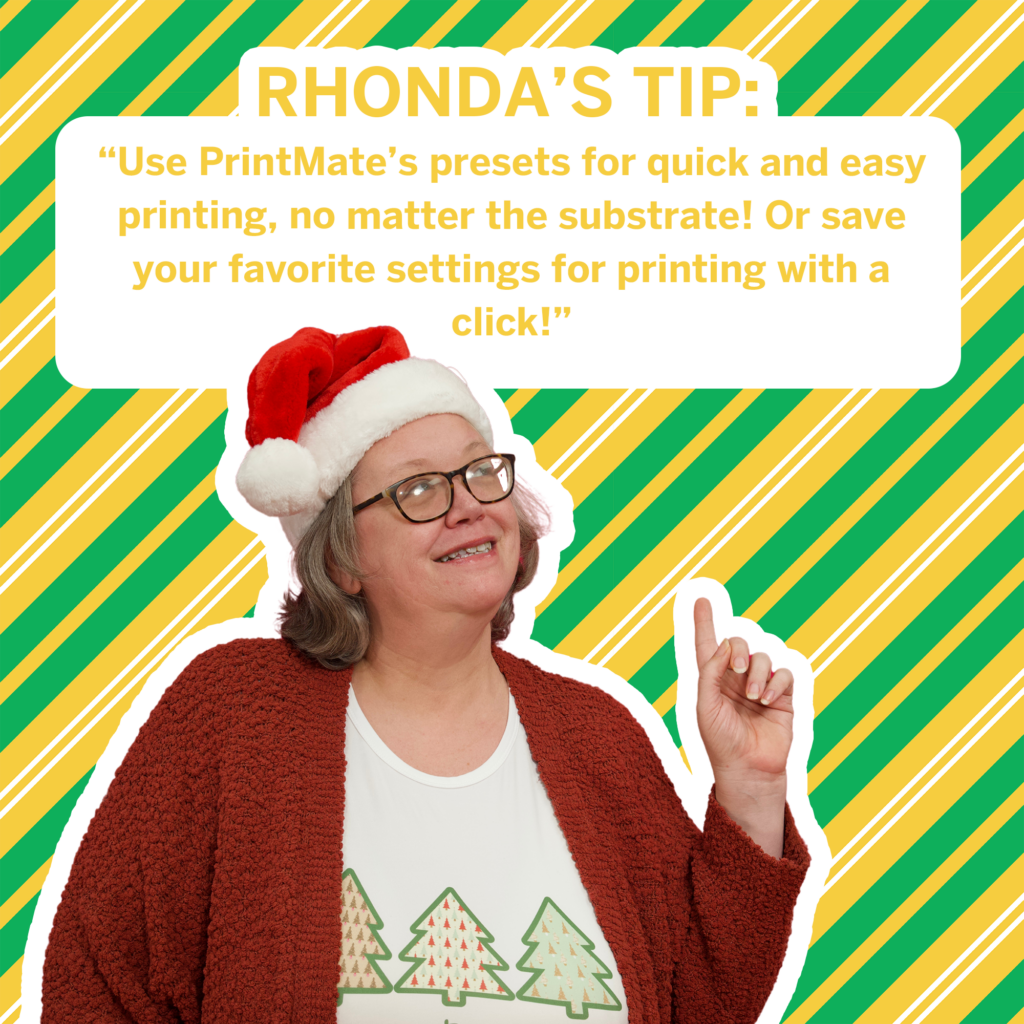
Tip 3: Manage Your Print, Make It Merry
Last but not least, let’s talk tech and color vibes. Introducing our new Sawgrass Print Utility. It’s like the holiday elf that’s got your back, offering fantastic color management tools. If you’re sublimation-savvy or just getting your feet wet, we’ve got presets galore to make sure you’re sleighing those settings. Feeling a bit artsy? Dive into our color management modes – from vibrant and photographic to grayscale. Plus, we’ve got color sliders for those who want to dance with the hues. You can save these to use on all of your projects! And for the advanced elves, AKA the color nerds among us, we’ve brought back spot colors. Your prints, your rules!
And there you have it, my Pro-Ho-Ho Tips for a season filled with happy sublimating! May your colors be vibrant, your prints flawless, and your holiday creations bring joy to all. ✨
Skill Level: Intermediate
Tools & Supplies to Make It:
- MySawgrass+ Membership
- SG500 or SG1000 Printer
- Mug Press
- Mug Paper or larger sublimation paper
- 15 oz Mug
- Denatured Alcohol and a Lint Free Cloth
- Heat Tape
How to Create It:
- Log into MySawgrass and from the Landing Page choose Design.
- For your product, select the 15oz Ceramic Mug It can be found under Drinkware
- On the Create Your Design Panel, click on Designs Click on the filter icon and then select Photo Frames and click apply
- Choose the Mama Photo Frame design
- To resize the image, use your mouse to lasso around the images and select them all as a group
- Then, use the resize icon on the group to reduce the size
- You can load a photo anywhere you see the gray boxes On the left, you’ll see an option to upload image
- Add and resize images as you need to fit on the design
- When your design is finished, hit the Save & Print button to move to the product details page
- You’ll be prompted to name your design, put it in a Category folder, and then hit save
- On the Product Detail page, you’ll give the project a name and add a description, then hit print
How to Print It:
- You should get a popup that asks if you want to open Sawgrass Print Utility. You will need to click Open Sawgrass Print Utility. If you are not seeing this, you’ll need to disable your popup blocker.
- In the Sawgrass Print Utility, start by scrolling down and making sure your print orientation is set to Landscape
- For this project, you can use the preset ceramic drinkware
- Make sure that the media size and type match what you have in the printer On the Color Management Tab, we suggest having the Color Mode set to Vibrant
- When you’ve confirmed all of your settings, Hit Print
How to Press It:
- Turn your mug press on and wait for it to heat up
- Prepare your mug by using a lint free cloth and denatured alcohol to remove any dust or fibers
- Tape your image down to the mug
- Place the mug in the heat press and close
- Once the press signals that it is complete, open the press and remove the mug
Tips & Tricks:
- On the upload images tab in the MySawgrass design tool, you can crop images as well as use filters to change the look of your image
- Ceramic mugs can also be pressed in a tumbler press
Skill Level: Advanced
Tools & Supplies to Make It:
- MySawgrass+ Membership
- SG1000 Printer
- 12 x 12 or larger flat Press
- 11x’17” or larger sublimation paper
- Neoprene wine tote
- Lint Roller
- Heat Tape
How to Create It:
- We are going to use a Custom Canvas for this project, so choose Open Custom Canvas at the bottom of the product category menu
- Enter 656” for your width and 14387 “ for your height
- Add a bleed of 25
- Hit Design Your Canvas to get started
- On the Create Your Design Panel, click on DesignsClick on the filter icon and then select Christmas and click apply
- Choose the Even the Naughty design
- To resize the image, use your mouse to lasso around the images and select them all as a group
- Then, use the resize icon on the group to reduce the size
- Use the move icon to place the designThink of the canvas as 4 sectionsThe text would go in the second section of the total
- To add the background, go to elements and then backgrounds
- We used hex code 709e78 for the background
- To add the reindeer, go to Elements and then Graphic Library
- Use the filter to find the Christmas elements
- Choose the image of the reindeer holding the wine glass and Christmas lights
- Use the re-size and move icons to size and position the image
- You’ll notice that you can change individual colors in the art if you choose
- Next, go to the same section and choose the holly
- Use the re-size and move icons to get the first one in place
- On the right side, use the duplicate icon to add another holly the same size
- You’ll need four totalYou can see the rotate icon as well to have the holly point different directions
- When your design is finished, hit the Save & Print button to move to the product details page
- You’ll be prompted to name your design, put it in a Category folder, and then hit save
- On the Product Detail page, you’ll give the project a name and add a description, then hit print
How to Print it:
- You should get a popup that asks if you want to open Sawgrass Print Utility. You will need to click Open Sawgrass Print Utility. If you are not seeing this, you’ll need to disable your popup blocker.
- In the Sawgrass Print Utility, start by scrolling down and making sure your print orientation is set to Portrait
- For this project, since the tote is made of Neoprene, you can use the preset Mousepad
- Make sure that the media size and type match what you have in the printer On the Color Management Tab, we suggest having the Color Mode set to Vibrant
- When you’ve confirmed all of your settings, Hit Print
How to Press It:
- Turn your press on and set the temperature to 380 degrees and the time to 45 seconds
- Prepare your wine tote by using a lint roller to remove any dust or fibers
- Tape your image down to the tote
- Place the wine tote in the heat press and close
- Wait 45 seconds before lifting the lid and removing the bag
Tips & Tricks:
- Pressing pillows are great for items with zippers to keep it flat during pressing
- When using the rotate function in the MySawgrass design tool, if you hold down the shift key, it will rotate in segments of 45 degrees
Skill Level: Intermediate
Tools & Supplies to Make It:
- SG1000 Printer
- 12 x 12 or larger flat Press
- 11x’17” or larger sublimation paper
- Santa Sack
- Lint Roller
- Heat Tape
How to Create It:
- Log into MySawgrass and from the Landing Page choose Design.
- For your product, select the Santa Sack. It can be found under Holiday
- On the Create Your Design Panel, click on Designs. Click on the filter icon and then select Pets and click apply
- Choose the North Pole design
- To resize the image, use your mouse to lasso around the images and select them all as a group
- Then, use the resize icon on the group to reduce the size
- The size of the selection will display at the top of your group
- Size the design to fit on the paper you have loaded in your printer
- Use the move icon to slide your design to the correct place on the Santa Sack
- Click on the name and you will have a text box on the leftClick on it and type the name of your pet
- When your design is finished, hit the Save & Print button to move to the product details page
- You’ll be prompted to name your design, put it in a Category folder, and then hit save
- On the Product Detail page, you’ll give the project a name and add a description, then hit print
How to Print It:
- In the Sawgrass Print Utility, start by scrolling down and making sure your print orientation is set to Portrait
- For this project, you can use the preset Polyester T-Shirt
- Make sure that the media size and type match what you have in the printer On the Color Management Tab, we suggest having the Color Mode set to Vibrant
- When you’ve confirmed all of your settings, Hit Print
How to Press It:
- Turn your press on and set the temperature to 400 degrees and the time to 45 seconds
- Prepare your sack by using a lint roller to remove any dust or fibers
- Tape your image down to the sack
- Place the Santa Sack in the heat press and close
- Wait 45 seconds before lifting the lid and removing the Santa Sack
Tips & Tricks:
- To avoid press lines, you can rip the edges of the paper before attaching with tape
- You can also use a pressing pillow that is larger than the design, but smaller than the paper
Skill Level: Intermediate
Tools & Supplies to Make It:
- My Sawgrass+ Membership
- Sawgrass SG500 or SG1000 Printer
- Tumbler Press
- 8. 5”x11” or larger sublimation paper
- 20 oz Skinny Tumbler
- Denatured Alcohol and a lint free cloth
- Heat Tape
How to Create It:
- Log into MySawgrass and from the Landing Page choose Design.
- For your product, select the 20oz Stainless Steel Skinny Tumbler. It can be found under Drinkware.
- On the Create Your Design Panel, click on Designs. Click on the filter icon and then select Education and click apply.
- Choose the Pencil design.
- If you’d like to leave the name in one color, simply click on the text and then in the box on the left. Change the name.
- If you’d like to do separate colors, follow the step above but just type the first letter.
- You will duplicate that letter and then go to fill color to change the color. The dark color swatches have good options or you can enter hex codes of your own.
- Repeat this process for each letter in the name.
- When your design is finished, hit the Save & Print button to move to the product details page.
- You’ll be prompted to name your design, put it in a Category folder, and then hit save.
- On the Product Detail page, you’ll give the project a name and add a description, then hit print.
How to Print It:
- You should get a popup that asks if you want to open Sawgrass Print Utility. You will need to click Open Sawgrass Print Utility. If you are not seeing this, you’ll need to disable your popup blocker.
- In the Sawgrass Print Utility, start by scrolling down and making sure your print orientation is set to Landscape.
- For this project, you can use the preset Stainless Steel Tumbler.
- Make sure that the media size and type match what you have in the printer. On the Color Management Tab, we suggest having the Color Mode set to Vibrant.
- When you’ve confirmed all of your settings, Hit Print.
How to Press It:
- Adjust your tumbler press to fit snuggly around the 20 oz skinny tumbler.
- Turn your press on and set the temperature to 375 degrees and the time to 60 seconds.
- Prepare your tumbler by using denatured alcohol on a lint free cloth to remove any dust or fibers.
- Wrap your design around the cup and tape it tightly in place with heat resistant tape.
- Place the cup in the heat press and close.
- Wait 60 seconds before opening the press and removing the tumbler.
Tips & Tricks:
- It is easiest to remove the paper from the tumbler if you do it as soon as it is pressed. If it does stick, the paper can be washed off with warm water.
- This Teacher’s Gift can be enhanced by adding a gift card or candy inside.