
Skill Level: Intermediate
Tools & Supplies to Make It:
- MySawgrass+ Membership
- Sawgrass SG500 or SG1000 Printer
- Tumbler Press
- 8.5”x11” or larger sublimation paper
- 20oz Skinny Tumbler with Bluetooth Speaker
- Denatured Alcohol and a lint free cloth
- Heat Tape
How to Create It:
- Log into MySawgrass and from the Landing Page choose Design.
- For your product, select the 20oz Skinny Tumbler with Bluetooth Speaker. It can be found under Drinkware.
- On the Create Your Design Panel, click on Elements and then Backgrounds. Click on Patterns.
- Click on the filter icon and then select Holiday and click apply.
- Choose the Lucky Charms pattern and hit done.
- On the Patterns Menu scroll down and adjust the size. We changed it to 12.3.
- When your design is finished, hit the Print button and then on the Print Screen click on Print File.
How to Print It:
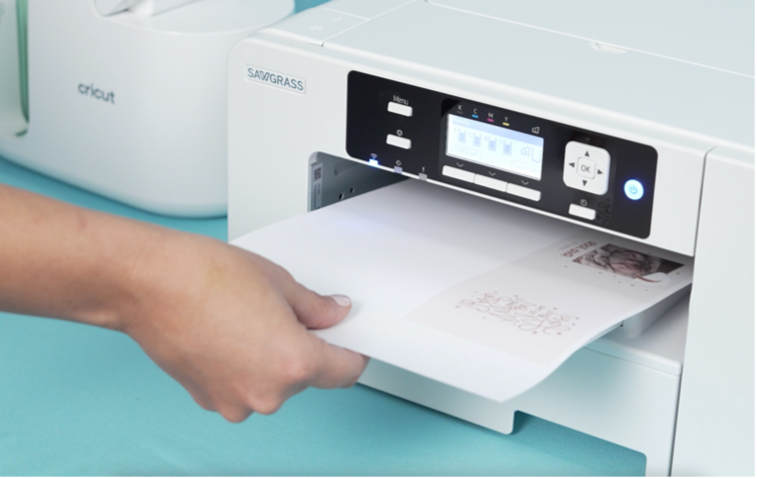
- You should get a popup that asks if you want to open Sawgrass Print Utility. You will need to click Open Sawgrass Print Utility. If you are not seeing this, you’ll need to disable your popup blocker.
- In the Sawgrass Print Utility, start by scrolling down and making sure your print orientation is set to Landscape.
- For this project, you can use the preset Stainless Steel Drinkware.
- Make sure that the media size and type match what you have in the printer. On the Color Management Tab, we suggest having the Color Mode set to Vibrant.
- When you’ve confirmed all of your settings, Hit Print.
How to Press It:
- Turn on your press on and set the temperature to 375F degrees and the time to 55 seconds.
- Prepare your tumbler by using denatured alcohol on a lint free cloth to remove any dust or fibers.
- Remove the lid and the bluetooth speaker.
- Wrap your design around the cup and tape it tightly in place with heat resistant tape.
- Place the cup in the press for 55 seconds.
- Once the alarm sounds, open press, rotate tumbler, reset press for 45 seconds and close press.
- When finished, remove the tumbler.
Tips & Tricks:
- With all tumblers, make sure to remove any accessories before putting in press.
- For full wrap tumblers, press for half the time, rotate, and then finish pressing.
- We did not add text to this design, but you could add a shape with text to personalize the design.
Skill Level: Advanced
Tools & Supplies to Make It:
- MySawgrass+ Membership
- SG1000 Printer
- 15”x15” or larger Flat Press
- 11”x17” or larger sublimation paper
- Felt Graduation Hat Topper
- Lint Roller
- Heat Tape
- Blowout Paper
How to Create It:
- Log into MySawgrass and from the Landing Page choose Design.
- For this product, we’ll open Custom Canvas.
- Click on Die cut shapes and choose the diamond.
- Set the width to 9.25” and the height to 9.25” as well.
- You can add a bleed of .125” to give you extra space.
- Click Design Your Canvas to add the Design.
- On the Create Your Design Panel, click on Designs.
- Go to the filter and click on Graduation and hit apply.
- Choose the Hey Look Ma design. The design should fill the area, but you can loop around the elements with your mouse to select them and then use the resize and move icons to adjust the image.
- Click on any of the Camera icons to add a photo.
- On the left panel that pops up, click replace image to find and add your image.
- One your image is in place, use the arrows and the Magnifying glass to position your image.
- Follow this same process for the other 3 images.
- When your design is finished, hit the Print Button and then choose Print from the options that pop up.
How to Print It:
- You should get a popup that asks if you want to open Sawgrass Print Utility. You will need to click Open Sawgrass Print Utility. If you are not seeing this, you’ll need to disable your popup blocker.
- In the Sawgrass Print Utility start by scrolling down and making sure your print orientation is set to Landscape.
- For this project, since it is fabric, you can use the preset Polyester T-Shirts.
- Make sure that the media size and type match what you have in the printer.
- On the Color Management Tab, we suggest having the Color Mode set to Photographic.
- When you’ve confirmed all of your settings, Hit Print.
How to Press It:
- Turn your press on and set the temperature to 400 degrees and the time to 60 seconds. Pressure should be medium.
- Prepare your cap topper by using a lint roller to remove any fibers or dust.
- Place your design face down on the cap topper and tape it down or use positioning spray.
- Place the topper on the lower platen of the press with the printed page on top.
- Place a piece of blowout paper on top.
- Close the press and wait 60 seconds before opening the press and removed the graduation cap topper.
Tips & Tricks:
- Make sure that no faces are close to the middle of the design as there will be a hole to fit this over your cap.
- Because this is felt, if it bends or curls in the press, place books or other weighted items on it while it cools.
Skill Level: Beginner
Tools & Supplies to Make It:
- MySawgrass+ Membership
- Sawgrass SG500 or SG1000 Printer
- Flat Press
- “8.5×11” or larger sublimation paper
- Light Up Photo Block
- Alcohol and a lint free cloth
- Heat Tape
- Blowout Paper
How to Create It:
- Log into MySawgrass and from the Landing Page choose Design.
- For your product, select the Light Up Photo Block. It can be found under Signs.
- On the Create Your Design Panel, click on Designs. Click on the filter icon and then select Inspiration and click apply and then more.
- Choose the Don’t be a lady, be a legend design.
- Use your mouse as a lasso to select the entire image. Then use the Move Icon and Resize Icon to fill the area with the design.
- When your design is finished, hit the Print button to send your job to the Sawgrass Print Utility
How to Print It:
- You should get a popup that asks if you want to open Sawgrass Print Utility. You will need to click Open Sawgrass Print Utility. If you are not seeing this, you’ll need to disable your popup blocker.
- In the Sawgrass Print Utility, start by scrolling down and making sure your print orientation is set to Landscape.
- For this project, you can use the preset Metal Keychain/Bag Tag.
- Make sure that the media size and type match what you have in the printer.
- You can use spacing under Design Files to move the images further apart.
- On the Color Management Tab, we suggest having the Color Mode set to Photographic.
- When you’ve confirmed all of your settings, Hit Print.
How to Press It:
- Turn your press on and set the temperature to 370 degrees Fahrenheit and the time to 60 seconds.
- Prepare your metal insert with a lint free cloth and alcohol to remove any fibers or fingerprints.
- Place your design face down on the insert and tape it down.
- Place the metal plate on the lower platen of the press with the printed page on top.
- Place a piece of blowout paper on the bottom and top.
- Close the press and wait 60 seconds before opening the press and removed the printed metal plate.
Tips & Tricks:
- Because this design has a base that is a portrait of a person, Photographic mode is going to give you the most realistic output with great skin tones.
- Any of these products with metal plates are great. Dealers will often sell the plates separately too, so you can change out the artwork in your product as often as you like!
Skill Level: Intermediate
Tools & Supplies to Make It:
- MySawgrass+ Membership
- Sawgrass SG500 or SG1000 Printer
- Flat Press
- “8.5×11” or larger sublimation paper
- Glass cutting board
- Silicone Mat
- Alcohol and a lint free cloth
- Heat Tape
- Blowout Paper
How to Create It:
- Log into MySawgrass and from the Landing Page choose Design.
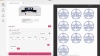
- For your product, select the Small Rectangle Glass Cutting Board. It can be found under Kitchen and Dining.
- On the Create Your Design Panel, click on Designs. Click on the filter icon and then select Food and Drink and click apply and then more.
- Choose the Life is Sweet design.
- Use your mouse as a lasso to select the entire image. Then use the Move Icon and Resize Icon to fill the area with the design.
- If you want the design to fully fill the area, grab the magenta dot on either side of the design and pull it outward to stretch the design. While stretching design can lead it to look distorted, this does not need much stretching and works great for this project.
- When your design is finished, hit the Print button to send your job to the Sawgrass Print Utility.
How to Print It:
- You should get a popup that asks if you want to open Sawgrass Print Utility. You will need to click Open Sawgrass Print Utility. If you are not seeing this, you’ll need to disable your popup blocker.
- In the Sawgrass Print Utility, start by scrolling down and making sure your print orientation is set to Landscape.
- For this project, you can use the preset Glass Cutting Board.
- Make sure that the media size and type match what you have in the printer.
- Though this setting should change with your Preset, verify that mirror is turned off.
- On the Color Management Tab, we suggest having the Color Mode set to Vibrant.
- When you’ve confirmed all of your settings, Hit Print.
How to Press It:
- Prepare your glass cutting board with a lint free cloth and alcohol to remove any fibers or fingerprints.
- Place your design face down on the insert and tape it down.
- Place the glass cutting board on the lower platen of the press with the printed page on top.
- Place a piece of blowout paper on the bottom and top.
- Place a silicone pad between the cutting board and the top plate of the press.
- Close the press and wait 60 seconds before opening the press and removed the printed glass.
- Glass holds heat well and will be very hot! Let it sit on a heat resistant surface for a while to cool before handling.
Tips & Tricks:
- When you press on glass you are pressing on the back and then viewing from the front. Glass is one of the very few instances where you do not need to mirror before printing
- Normally with sublimation, you are starting with a white base. That creates a very vibrant image. Because the glass is transparent, light flows through your print. You will never get as vibrant and bold as print on glass. When selling a glass cup, you can fill the cup with a white paper, like tissue paper, to make the design pop. On a glass cutting board, your image will always be muted. The easiest way to control that is when you choose your artwork. Go for photos that have lots of contrast and strong coloring. For designs, go for ones with solid, bold colors like the one we chose today.
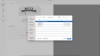
Your Sawgrass Printer ink level status keeps you informed about your ink levels, ensuring you can replace the cartridge before it runs out during print jobs.
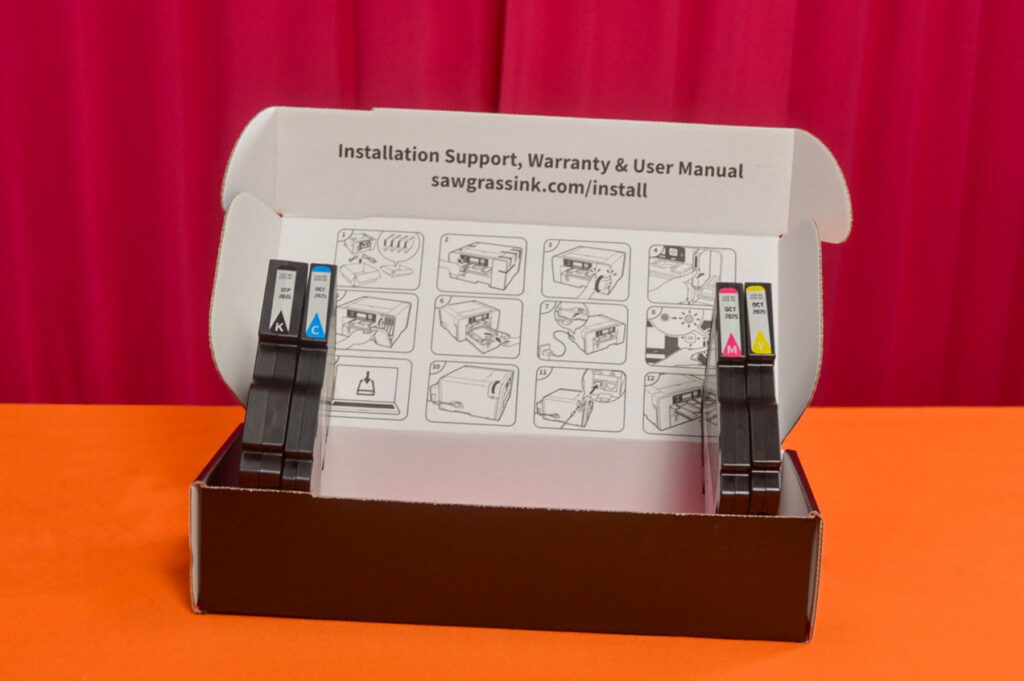
Your Sawgrass Starter Kit
When you receive your Sawgrass system, you will receive the printer and a starter kit which includes your first set of inks. Depending on where you purchase your printer, you may receive starter inks carts or regular ink carts. The printer will use ink to initially fill the ink lines and prepare the printer for use.
What is the difference between starter ink carts and standard ink carts?
The amount of ink in each type of cart is different. See below:
· Starter Carts include 20 mls.
· Standard Carts include 31 mls.
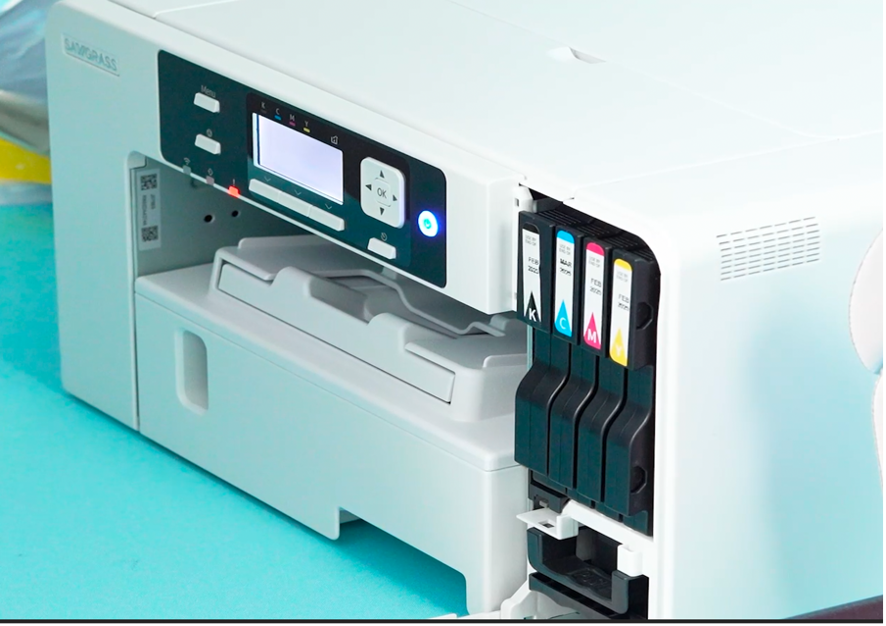
Ink Warnings You Will See On Your Printer
The first ink level status your Sawgrass printer will display is low ink. If you have received starter carts, you may see a low ink status soon after the initial setup of the printer. This is normal and does not mean you need to replace the cartridges immediately. You can safely continue printing. It simply means, one of your ink cartridges is running low. We recommend you order inks from your Sawgrass Dealer at this time.
The replace ink or depleted ink status means that your printer has detected that one of your ink cartridges is empty. To maintain optimal printer performance, please replace the empty cartridge(s) to resume printing. Until the empty carts are replaced, your printer will not allow you to print.
For more information on your printer, check out this article on Printer Maintenance and more on our Sawgrass Care Page.
You may know how to apply your designs to a sublimation substrate like a pro but sometimes coming up with a design is the most challenging part of crafting. You want to be unique and have your work stand out from everyone else but that can be very difficult now with so many people delving into the crafting pool. Finding inspiration and making a design can be both fun and frustrating. I try to put a lot of thought behind each piece I design: will the person like it, what are their likes/dislikes, what are their favorite colors, and so much more. Personalization helps to make your designs unique. Finding a design source or images to use can be frustrating and with so many websites offering paid and free designs it can be overwhelming.
Start with your Product and Work from There
I start with my substrate; whether it be a tumbler, pen, ornament, or t-shirt. The design needs to fit the medium you are applying it to. What looks good on a tumbler doesn’t necessarily work on a T-shirt. There are many aspects to what the finished product will be depending on the size your printer will print, the size of your application/heat devices. This is generally the first consideration when I am starting a project.
Some things to consider:
- What shape is the design area? You’ll need a design that fits well in your space
- Is the product a color other than white? If so, you’ll need a design that stands out, and is not impacted, on the color or pattern.
- If your printer cannot product a design on sublimation transfer paper large enough to cover the entire area, you can always add a design that looks good. Generally, it would be something without a background since you cannot fill the full space.
Finding Inspiration
Now it is time to find my “inspiration”, often people will request something specific and other times they may be vaguer. This is the point when I begin to do my research. I look at Facebook groups, Instagram, Pinterest, and google.
There are many websites who also have pre-made designs if you are lacking inspiration. The MySawgrass design tool has many free designs and elements, but if you aren’t finding what you had in mind there are many other sites. Canva, Creative Fabrica, Jennifer Maker, Caluya Designs are just a few that offer free designs. Also, there are many file sharing Facebook groups for sublimation designs and ideas. You may browse hundreds of designs before deciding on the perfect one.
Bringing it All Together
Once I have found my inspiration or designs I would like to use, it is time to bring it all together and add finishing touches but what platform should I use to personalize and complete my product design? I use the MySawgrass design tool and Canva to get the best results. The MySawgrass platform and is specifically designed to work with my Sawgrass printer and I find I get the best results even when importing PNG designs from other locations into the design tool. Canva is also great due to the fact I can save my designs in a PNG format and upload to the MySawgrass design tool or the Sawgrass Print Utility, the current print management tool created by Sawgrass. Making your design look its best can be tricky if you aren’t trained in graphic design; you need to work on placement, sizing, and visual appeal. Remember to measure your substrate or use a pre-loaded blank design in the design tool to get the best sizing. You want to add eye catching colors; remember the white area on sublimation blanks so considering your background is essential, add eye catching text and most importantly target the customer.
MySawgrass not only offers designs to use, but elements as well. The beauty of the MySawgrass design tool is much of the pre-loaded content is designed so that you can edit the colors in the images. This gives you the ability to customize the design to be your own and help it match with anything else you may be using or uploading into the program.
Creating Designs that Sell
Encouraging sales of your products can be hard, you need something unique that stands out from what others are trying to sell. You also need to know current trends; I try to keep up with the latest trends by following Facebook groups and browsing social media for ideas and trends. Often times if your work stands out as quality work many people will come to you with requests and have designs in mind that you can work with.
An easy way to expand your selling potential is to create a MySawgrass store. You can post your items for sale and then you have share links to get your products in front of our customers. The best part? If someone orders from your store, you are the producer as well and the order will be sent to you. This feature is currently available in the US only, but it is a great way to create and produce while letting us handle the paperwork!
Final Tips
Sublimation is an awesome way to make custom products; practice and wasting blanks, paper and ink are all part of the learning curve. Finding groups on social media has been a huge help for me, because if I am having issues there is definitely someone else out there having the same issue and the crafting community is a great resource for support and encouragement. My suggestion is to keep a notebook with all the websites that offer designs, your measurements and times/temp you are using for each substrate. You will find your notebook will come in handy for future projects. Just remember this is crafting it is meant to be a source of relaxation and an outlet for your creativity. Just have fun and inspiration will come.
Good Luck and Happy Crafting!
In the two years leading up to the release of the Sawgrass Print Utility, we spent extensive time in round tables with our users. We asked them not only what they liked and did not like in our existing print management solution, but also studied their workflow within the program. Between that information and what we observed in technical support sessions, we know that many users were unsure of what options to choose and would often just print without changing any settings.
The Purpose of the Sawgrass Print Utility
The foundation of getting a good print from your Sawgrass SG500 or SG1000 is our print management software. Color profiles have been built for every single combination of settings that can be chosen. No matter your substrate, paper, or color preference, a color profile exists that will give you the proper output with great color. Color profiling took many months and lots of tweaking to ensure that the results our customers achieve is unrivaled.
There are other settings in the Sawgrass Print Utility that are equally as important. Some products do not require mirroring before printing. For heat transfer vinyl, you would print on the vinyl and the back of the vinyl is pressed to the product. With acrylic and glass, you are pressing onto the back of the product and viewing it from the front, making it mirroring unnecessary.
The Power of Presets
One of the most important features that we added to the new print utility was Presets. Located at the top of the Print Settings panel in the Sawgrass Print Utility the Presets menu includes a list of the most commonly used blanks for sublimation. By choosing one of these, your settings automatically change to reflect settings for the best possible output. This takes the guesswork out for our users. You need not worry if you’re making the right choices for the material you are using. We will change those settings for you.
As a note, there are two job settings that you will need to check when using presets: Media Size and Media Type. You will still need to choose your media size and your media type and match it to what you have loaded in your printer.
Presets can be used even if your specific product isn’t mentioned. Just look for something that would be the same material. For example, a canvas or linen pillowcase is going to be the similar to a canvas tote bag. Any other fabric material is most likely going to be polyester, and would be the same settings as a t-shirt. For many users, it would be easier to find a similar product and choose a preset than to do the settings on their own. Less clicks too!
That is our tech tip of the week! Check out our blog and social media every Friday for new ways to get the most out of your Sawgrass system!
One thing I can consistently hear from Sawgrass Users is a desire to save paper. Often, I’ll be asked if you can cut the paper and then use the remainder for another job. While this works for vinyl cutters, it’s not the best solution for printers. Using non-standard size paper in any printer can cause jams. But you have nothing to fear – there is functionality in the Sawgrass Print Utility to help you simplify the process of putting multiple designs on your sublimation transfer paper.
Ways to Send to Sawgrass Print Utility

There are four different ways to send files to the Sawgrass Print Utility:
- You can send files from our MySawgrass design tool
- You can upload files directly into the Sawgrass Print Utility with Create and Add Buttons
- You can send directly from any program on your Windows or MacOS using Send to Sawgrass Print Utility
- You can drop projects into your Quick Print folder on your desktop
As a reminder, you will configure your settings for those last two options in the Sawgrass Print Utility before sending your files. With both Send to Sawgrass Print Utility and Quick Print Folders, you can enable AutoPrint so your files go to the printer with your settings while skipping the extra step of the jobs opening in the Sawgrass Print Utility. You will need to disable that so your files will open in Sawgrass Print Utility for what we’re working on today: Ganging and Nesting.
Understanding Ganging & Nesting
These big words have very simple definitions: Nesting is when you combine multiples of the same image on your page; ganging happens when you use several different images to fill your paper.
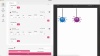
Nesting
We’ll start with Nesting. For this example, I’ve added a design by clicking Create. By default, your first image is going to be in the top left corner. It will be moved in far enough from the corner so that it fits within the margins of the printer. If you need more room around the image, you can go down to your print settings and center the image on the page. With multiples, it is fine to start in the top left corner.
One very important thing to discuss is the size of your image. When you bring in a design, it is going to respect the canvas from the original document. For example, if you created something on a canvas that is 9”x4”, it is going to reflect that as the size, even if your actual design is only 3”x 5”. The extra area around your actual image can be removed by clicking the “crop to image area” button. This is very helpful with ganging and nesting.
To add more copies of this design, I’ll just go to repeat and increase the number. You can manually enter the number or use the up arrow. Now that our images are on the page, let’s add more space between them to make sublimating them easier. In our Design Files area, you’ll adjust the spacing. As we saw with adding copies, you can type in a number or use the up arrow. It should be noted that space is being added to the right and bottom of each image. This gives you more accurate spacing.
Once you have your page setup, you can hit print. If you needed more copies of an image than what you are seeing on your page, you can use your page options at the bottom of the job settings. Let’s say I actually needed thirty of this image. I can just increase the number of copies. Note that in this case, you’re not increasing the number of images, but of complete pages.
Ganging
Ganging is going to similar, but there are a few differences we need to point out. We’ll start with an example where we drop our images into our Quick print folder on our desktop. As you’ll see both images drop into the same Sawgrass Print Utility tab. You’ll see that both files are in the Design Files section and you have an arrow you can use to collapse or expand the jobs as you’re working with both. If you needed multiples of any of your designs, you can still change that under repeat. You can also change the spacing on each design, or by clicking the button for “space all items simultaneously,” you’ll get a box where you can add the spacing to all images on your page.
To maximize space on your paper, you can also rotate your image to increase the number that fit on a page. If you are doing multiples of a single design, you’ll see that all copies rotate.
If you are ganging multiple images, you can add new projects to the page with the add button. The Add button opens a finder window so you can grab files on your computer. You’ll notice that if you select multiple files, they will all be added to your project. This is a great time saver when grabbing multiple files!
When sending jobs from the MySawgrass design tool to Sawgrass Print Utility, each job will open a new tab. In the Design Files area of the Sawgrass Print Utility, choose one of your jobs from the “Select a Job” list and then select “Merge into Tab.” This will combine your jobs into the same tab and you’ll be able to adjust your spacing and rotate as needed to get the best fit.
That’s the basics on ganging and nesting. If you have any issues or questions, please reach out to our support team at care.sawgrassink.com. See you next time!
Skill Level: Intermediate
Tools & Supplies to Make It:
- MySawgrass+ Membership
- Sawgrass SG500 or SG1000 Printer
- 15”x15” or larger Flat Press
- 11”x17” or larger sublimation paper
- Floor Mat
- Lint Roller
- Heat Tape
- Blowout Paper
How to Create It:
- Log into MySawgrass and from the Landing Page choose Design.
- For your product, we’ll be using a Custom Canvas. From the product menu, choose Open Custom Canvas.
- Neither our SG500 or SG1000 would fit paper large enough to cover the entire mat. You can flex this design to fit your print size capabilities.
- Set your dimensions to your paper size. If you’d like to add a bleed, that can serve as a margin. Just make sure to make your canvas slightly smaller than your paper so the bleed does not make it bigger than your paper.
- Once your canvas size is set, click Design Your Canvas.
- On the Create Your Design Panel, click on Elements and then Backgrounds.
- Make sure to go to the Patterns tab and search for the background Easter_Floral_Simple_Pink. Click to select it and then click done to use it.
- With the sliders, you can adjust the size and style of the pattern. When you are finished editing, hit done again to apply it.
- Since the background will not fill the entire mat, you can choose to skip adding it.
- To add the letters for Hop, choose Fonts from the Create Your Design panel.
- In the text box on the left, type the letter H.
- From the pull down menu, choose the font Sunny Spells, click on the Fill Color and use Hex Code #8DC5BA. When you are finished, make sure to click done.
- Repeat the same process for the letter P.
- To add the phrase on in, choose Fonts from the Create Your Design panel.
- From the pull down menu, choose the font Mama, click on the Fill Color and use Hex Code #F0A48A. When you are finished, make sure to click done.
- Next, on the Create Your Design panel, go to Elements and then Graphic Elements.
- Use the filter and click the plus next to Holiday and then choose Easter.
- Scroll down to the yellow bunny and choose it.
- To reduce or enlarge the image size use the resize icon on the group to adjust the size and the move icon to locate it between the two letters.
- Use the filter and click the plus next to Holiday and then choose Easter.
- Choose the floral stem from the top row.
- To reduce or enlarge the image size use the resize icon on the group to adjust the size and the move icon to locate it on the bunny.
- You will also use the rotate icon to slightly angle it.
- When your design is finished, hit the Print button to send the file to the Sawgrass Print Utility.
How to Print It:
- You should get a popup that asks if you want to open Sawgrass Print Utility. You will need to click Open Sawgrass Print Utility. If you are not seeing this, you’ll need to disable your popup blocker.
- In the Sawgrass Print Utility, start by scrolling down and making sure your print orientation is set to Landscape.
- For this project, since it is fabric, you can use the preset Polyester T-Shirts.
- Make sure that the media size and type match what you have in the printer.
- On the Color Management Tab, we suggest having the Color Mode set to Vibrant.
- When you’ve confirmed all of your settings, Hit Print.
How to Press It:
- Turn your press on and set the temperature to 365 degrees and the time to 60 seconds. Pressure should be medium to heavy.
- Prepare your mat by using a lint roller to remove any fibers or dust.
- Place your design face down on the door mat and tape it down.
- Place the mat on the lower platen of the press with the printed page on top.
- Place a piece of blowout paper on top.
- Close the press and wait 60 seconds before opening the press and removed the door mat.
Tips & Tricks:
- Getting lines on your fabric items? Ripping the edges of paper helps prevent those hard lines.
- If you have a smaller press and a larger item, custom canvas is a great way to make a print area that works for you.
- Removing the background is one way to adjust a design for a smaller area. If you like the idea of the background pattern, you can always frame it by putting a rectangle behind it and making it a complimentary solid color.
Skill Level: Basic
Tools & Supplies to Make It:
- MySawgrass+ Membership
- Sawgrass SG500 or SG1000 Printer
- 15”x15” or larger Flat Press
- 11”x17” or larger sublimation paper
- Blue Linen Bunny Bag
- Lint Roller
- Heat Tape
- Blowout Paper
How to Create It:
- Log into MySawgrass and from the Landing Page choose Design.
- For your product, select the Blue Linen Bunny Bag. It can be found under Bags & Totes.
- This project does not start with a Design, but will be built from elements and text.
- On the Create Your Design Panel, click on Elements and then Shapes.
- We’re going to spell out the child’s name using the Bubble Letters.
- Choose the first letter you need and hit apply. You may need to hit more to find the letter you need.
- You will need to resize and arrange the letters by using the move and resize icons on each letter.
- Use this method to add all of the letters you will need. Lines will appear to help you align the letters.
- You can use the vertical align tool form the right panel to center the letters on the bag. This is an easy way to make sure the letters are aligned with each other.
- Another thing you should verify is if the letters are the same height. You can do this by typing the same dimension in the height field of the size on the left panel.
- Once you have all the letters sized and aligned, we’ll fill them with a pattern.
- At this time, they must be filled with patterns that you upload, and not ones in DesignMate. Because of this, we are proving your artwork for this project!
- Click on the files below and download them to your computer.
- Once the is done, click on the first letter. An option menu will pull up on the left. Click on the button labeled Use this as mask.
- A new box will appear that allows you to upload your pattern.
- Click on the icon and then search for the downloaded designs on your computer. Select the one you want to use first and click Open.
- The pattern will fill the letter.
- If you click the letter, you will get options on the left panel to move your pattern around in the letter and to make the pattern larger or smaller.
- Complete this process for each letter.
- To add the bunny ears to a letter, go to Elements on the Create Your Design panel.
- Click on the Graphics Library button.
- In the search bar, look for Easter_Doodle_Bunny_Ears.
- You will need to resize and arrange the graphic by using the move and resize icons on the ears. Position them on the middle letter.
- Once your design is finished, you can use the print button in the design tool to send the file to the Sawgrass Print Utility.
- Once you hit Print, you’ll click Print File.
How to Print It:
- You should get a popup that asks if you want to open Sawgrass Print Utility. You will need to click Open Sawgrass Print Utility. If you are not seeing this, you’ll need to disable your popup blocker.
- In the Sawgrass Print Utility, start by scrolling down and making sure your print orientation is set to portrait.
- For this project, you can use the preset Polyester T-Shirts.
- Make sure that the media size and type match what you have in the printer. T-shirts are set up for tabloid, but if you want a smaller design, set your paper size and then go to design files and click Fit to Paper Size.
- On the Color Management Tab, we suggest having the Color Mode set to Vibrant.
- When you’ve confirmed all of your settings, Hit Print.
How to Press It:
- Turn your press on and set the temperature to 356 degrees and the time to 120 seconds. Pressure should be medium.
- Prepare your tote by using a lint roller to remove any fibers or dust.
- Place your design face down on the tote and tape it down.
- Place the tote on the lower platen of the press with the printed page on top.
- Place a piece of blowout paper on top.
- Close the press and wait 120 seconds before opening the press and removed the bag.
Tips & Tricks:
- Getting lines on your fabric items? Ripping the edges of paper helps prevent those hard lines.
- Place blowout paper in the tote to prevent any ink from accidentally getting on the back of the shirt.
- If you are having trouble clicking on letters after you have started to add the patterns, use the send to back option on the right panel to send finished letters behind ones that remain.