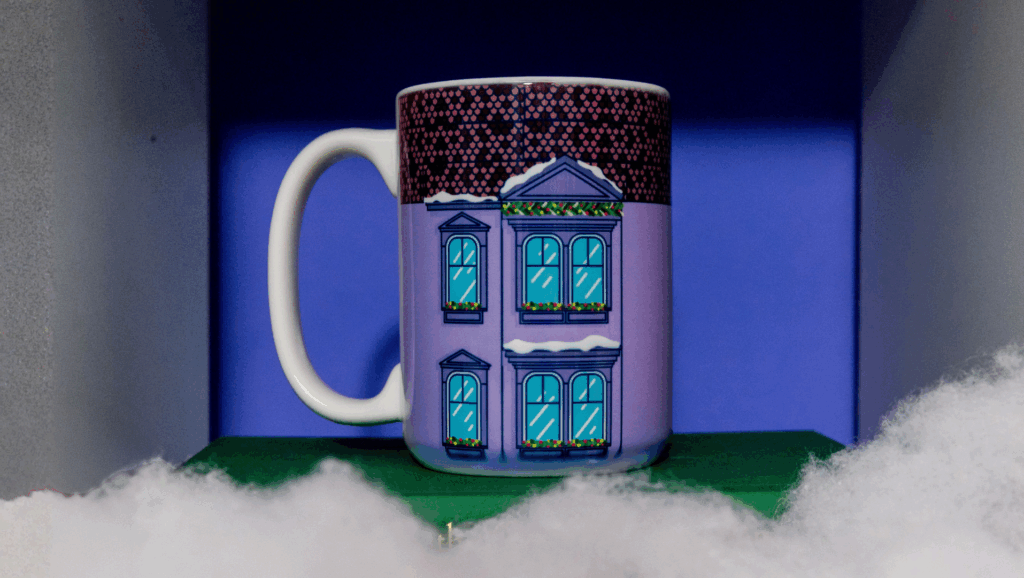
Skill Level: Beginner
Tools & Supplies:
- MySawgrass+ Subscription
- SG500 or SG1000
- VersiFlex Inks or Sublijet UHD Inks
- Truepix Classic Paper
- 15oz Ceramic Mug
- Mug Press
- Heat Tape
How To Create It:
- Click the DESIGN button on your MySawgrass dashboard.
- Select Product: 15oz Ceramic Mug
- Select Your Design: B201D_Christmas_Village_House_Mug
- Size to fit canvas.
- Send your ready to design to print utility by clicking PRINT.
How To Print It:
- Select your ready printer.
- Select Ceramic as the product.
- Load printer with Truepix Classic Paper
- Click Print.
How To Press It:
- Temperature: 350-400°F
- Temperature: 150-300 seconds
- Pressure: High
- Trim your paper down to the print area.
- Wrap your paper around the mug with print side facing the mug.
- Secure with heat-resistant tape.
- Place your mug into your mug press and press.
- Press for 150-300 seconds at 350-400°F
- When the timer sounds, open your press and peel your print. Be careful, product will be hot. Use a glove or let the product cool before peeling.
Tips & Tricks
- Customize colors, add a street address or add a custom name plate to the door to make it personal.
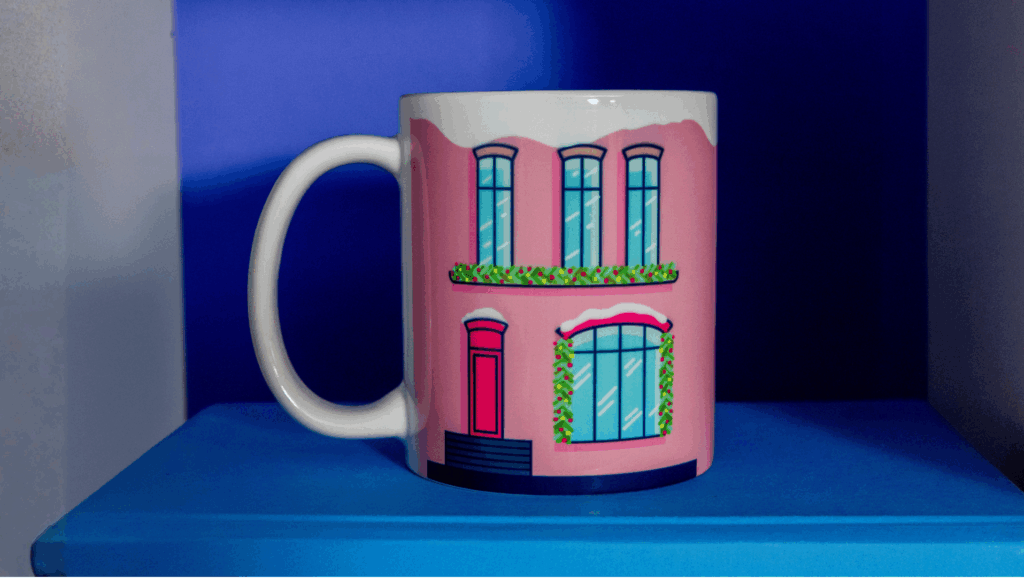
Bring festive cheer to every sip with a Christmas Village House 11oz Mug! Featuring a cozy holiday village design, it’s perfect for warm drinks and seasonal moments for a charming, long-lasting holiday keepsake.
Skill Level: Beginner
Tools & Supplies:
- MySawgrass+ Subscription
- SG500 or SG1000
- VersiFlex Inks or Sublijet UHD Inks
- Truepix Classic Paper
- 11oz Ceramic Mug
- Mug Press
- Heat Tape
How To Create It:
- Click the DESIGN button on your MySawgrass dashboard.
- Select Product: 11oz Ceramic Mug
- Select Your Design: B101D_Christmas_Village_House_Mug
- Size to fit canvas.
- Send your ready to design to print utility by clicking PRINT.
How To Print It:
- Select your ready printer.
- Select Ceramic as the product.
- Load printer with Truepix Classic Paper
- Click Print.
How To Press It:
Temperature: 350-400°F | Temperature: 150-300 seconds | Pressure: High
- Trim your paper down to the print area.
- Wrap your paper around the mug with print side facing the mug.
- Secure with heat-resistant tape.
- Place your mug into your mug press and press.
- Press for 150-300 seconds at 350-400°F
- When the timer sounds, open your press and peel your print. Be careful, product will be hot. Use a glove or let the product cool before peeling.
Tips & Tricks
- Customize colors, add a street address or add a custom name plate to the door to make it personal.
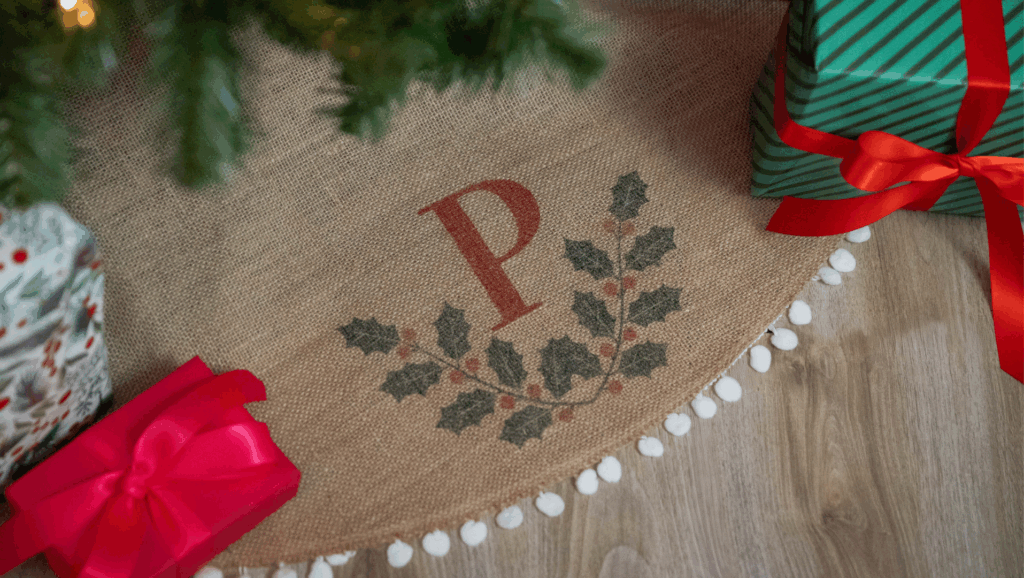
Crafted with classic burlap and festive holly details, this project brings rustic charm and personalized flair to your holiday décor. Use Sawgrass VersiFlex to easily add your family monogram and make it a keepsake you’ll love for years to come.
Skill Level: Intermediate
Tools & Supplies:
- MySawgrass+ Subscription
- SG500 or SG1000
- VersiFlex Inks
- VersiFlex Light Paper
- Flat Press
- Burlap or Fabric Tree Skirt
- Blowout Paper
How To Create It:
- Click the DESIGN button on your MySawgrass dashboard.
- Select Custom Canvas: Rectangle 9” x 7”
- Select Your Design: Holly_Jolly_Monogram
- Size to fit canvas, personalize with your desired initial.
- Send your ready to design to print utility by clicking PRINT.
How To Print It:
- Select your ready printer loaded with Sawgrass VersiFlex inks.
- Select the Burlap preset, or select Natural Fabrics (Burlap, Canvas Linen) as the product.
- Load printer with VersiFlex Light paper.
- Click Print.
How To Press It:
Temperature: 375°F | Temperature: 30 seconds | Pressure: High
- Position your tree skirt onto the base of your heat press.
- Prepress your fabric for 10-15 seconds to release moisture. If you see steam when releasing the press, press again until the steam disappears.
- While the print is still slightly tacky, place your print face down onto the center of the tree skirt. Do not reposition your print once you have it placed.
- Place a piece of protective blowout paper over your print to protect your heat press from any excess ink.
- Press for 30 seconds at 375°F at high pressure.
- When the timer sounds, open your press and peel your print immediately. Delayed peeling will cause the paper to stick.
- Place the blowout paper back over the printed fabric and press for another 10 seconds to seal the print.
1. Glitter Gradient Ceramic Mug
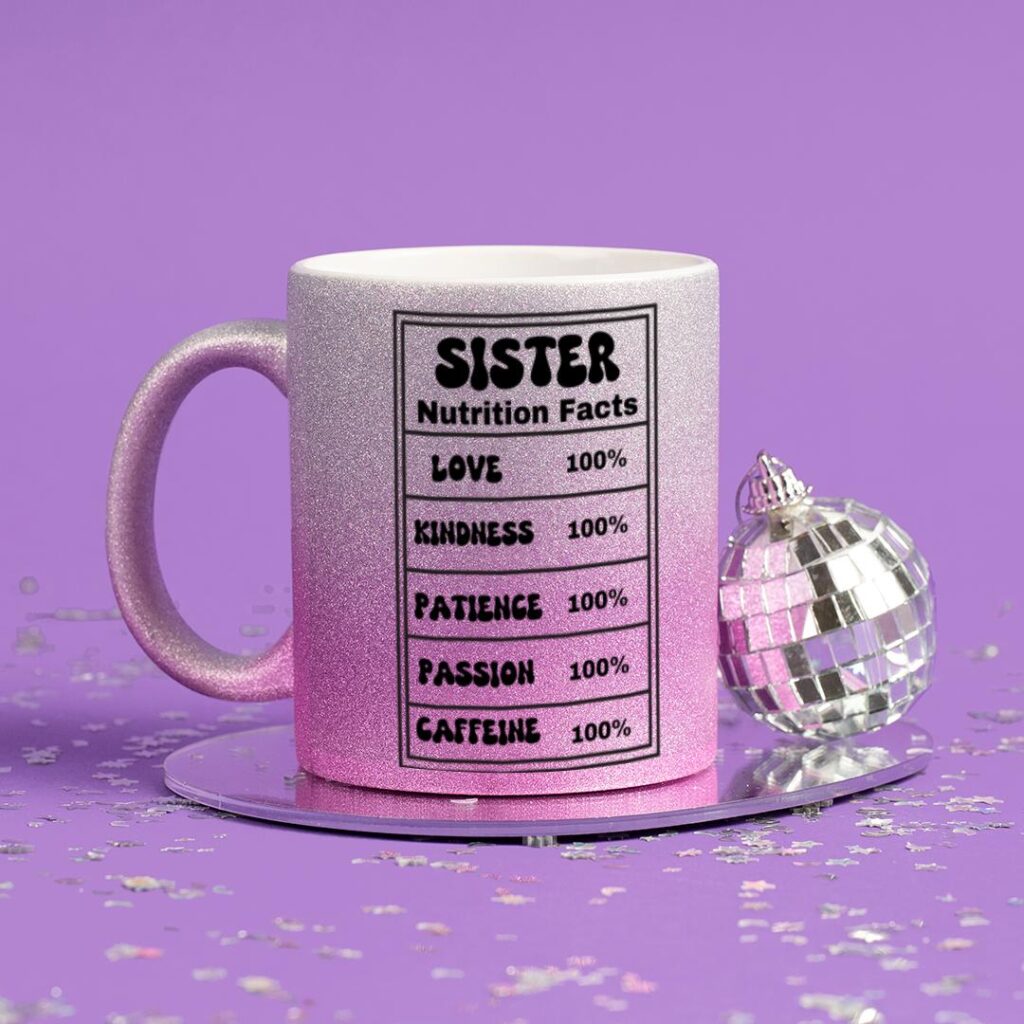
Fit for any Barbie morning routine, this Glitter Gradient Ceramic Mug not only holds your favorite brew but does so in glitzy style. To sublimate, print your design on sublimation paper using your Sawgrass printer, secure it around the mug with heat-resistant tape, and use a Tumbler Press for 190 seconds at 385°F with Medium Pressure.
2. Sequin Pencil/Makeup Case
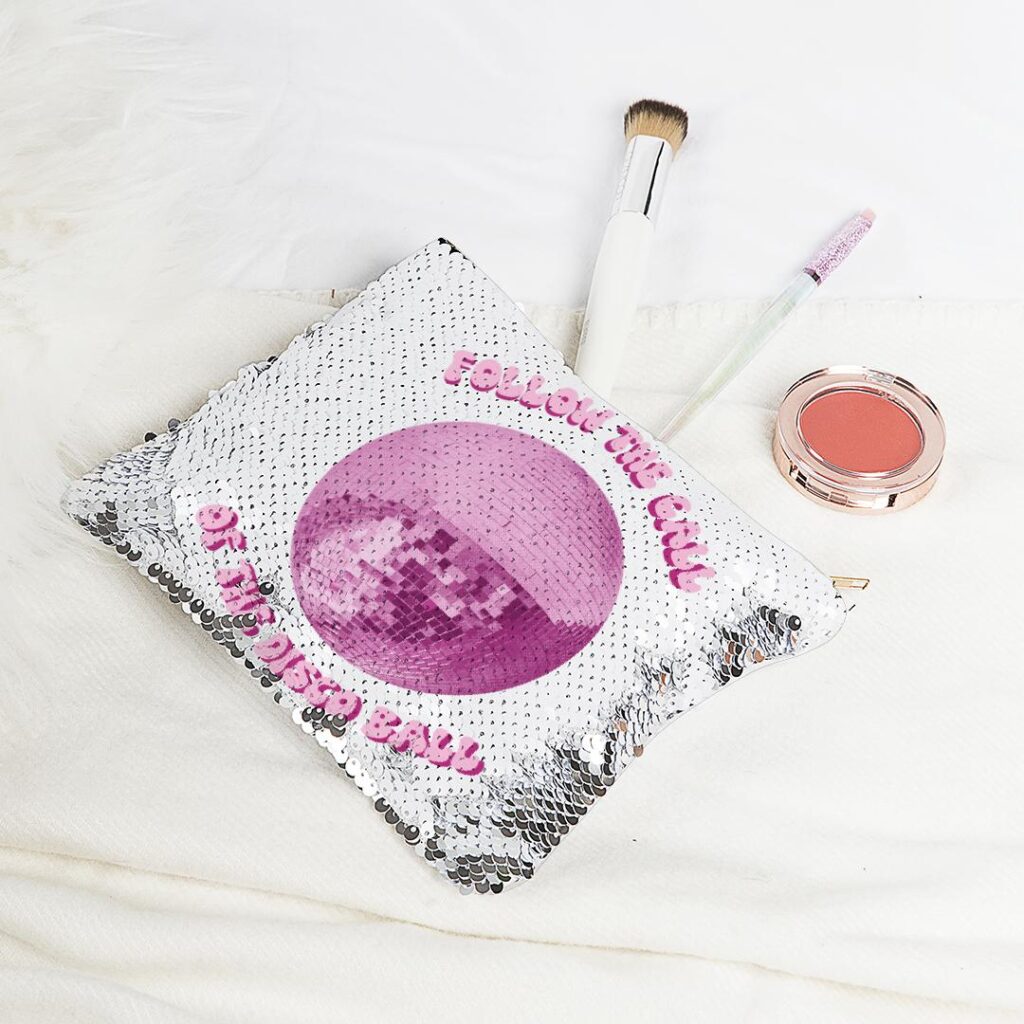
A travel bag that is just as glamourous as you! This fun sequin bag is perfect for travel make up, pencils or other items that you need throughout your day. While sublimation on sequins can be tricky, we’ve made most of the steps a breeze with PrintMate’s color and substrate profiles so you can be confident you’re getting the best print for any project. Upload your design, select the metal option and press print. Once you have your design, secure it onto the white sequins (make sure every white side is showing!) with heat resistant tape. Use a Flat Press for 45 seconds at 385°F with Medium Pressure.
3. Makeup/Pencil Case – White Glitter
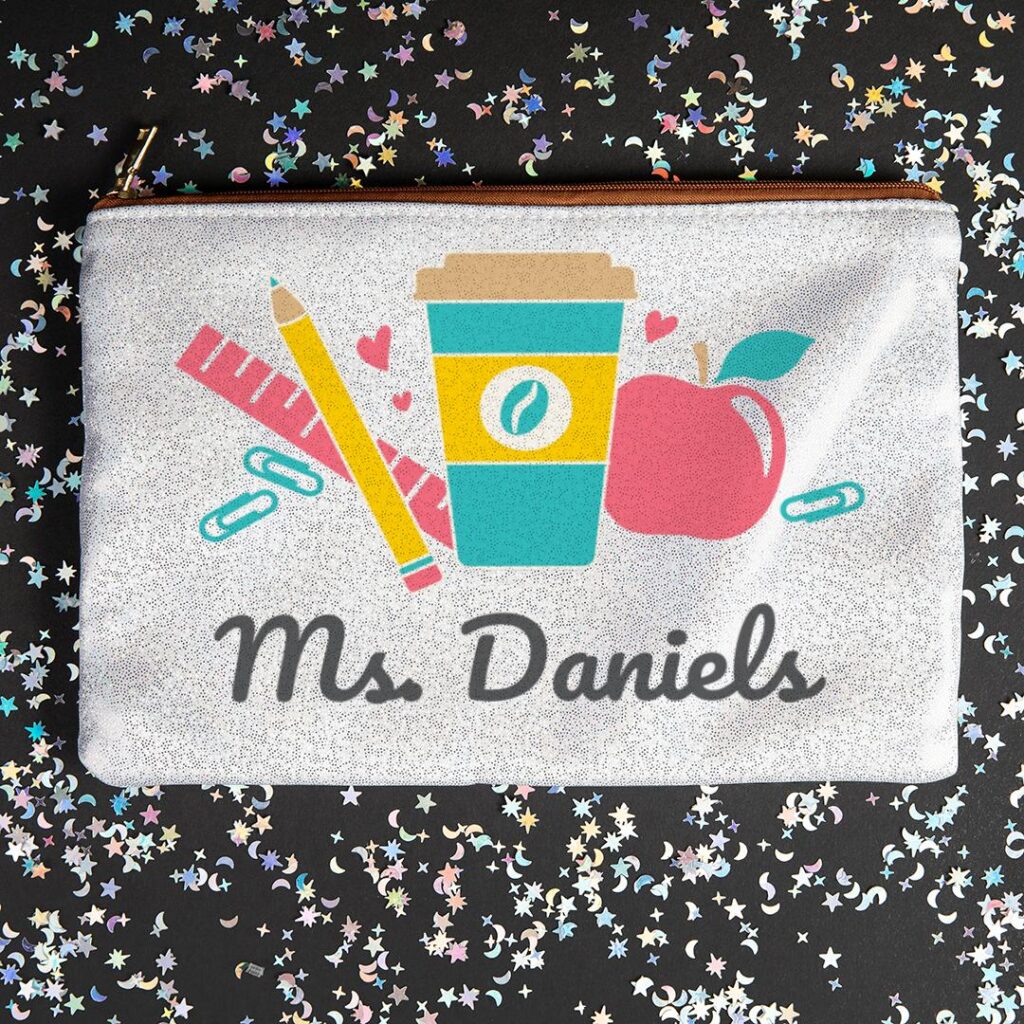
Not into sequins but still know someone who loves to shine? The White Glitter Makeup/Pencil Case is a stunner. Sublimate with ease using your Sawgrass printer, ensuring your design covers the entire surface. Be sure to prep any substrate by lint rolling first. Use a Flat Press for 60 seconds at 385°F with Light-Medium Pressure.
4. 12 oz Stainless Steel Stemless Wine Cup – White Glitter
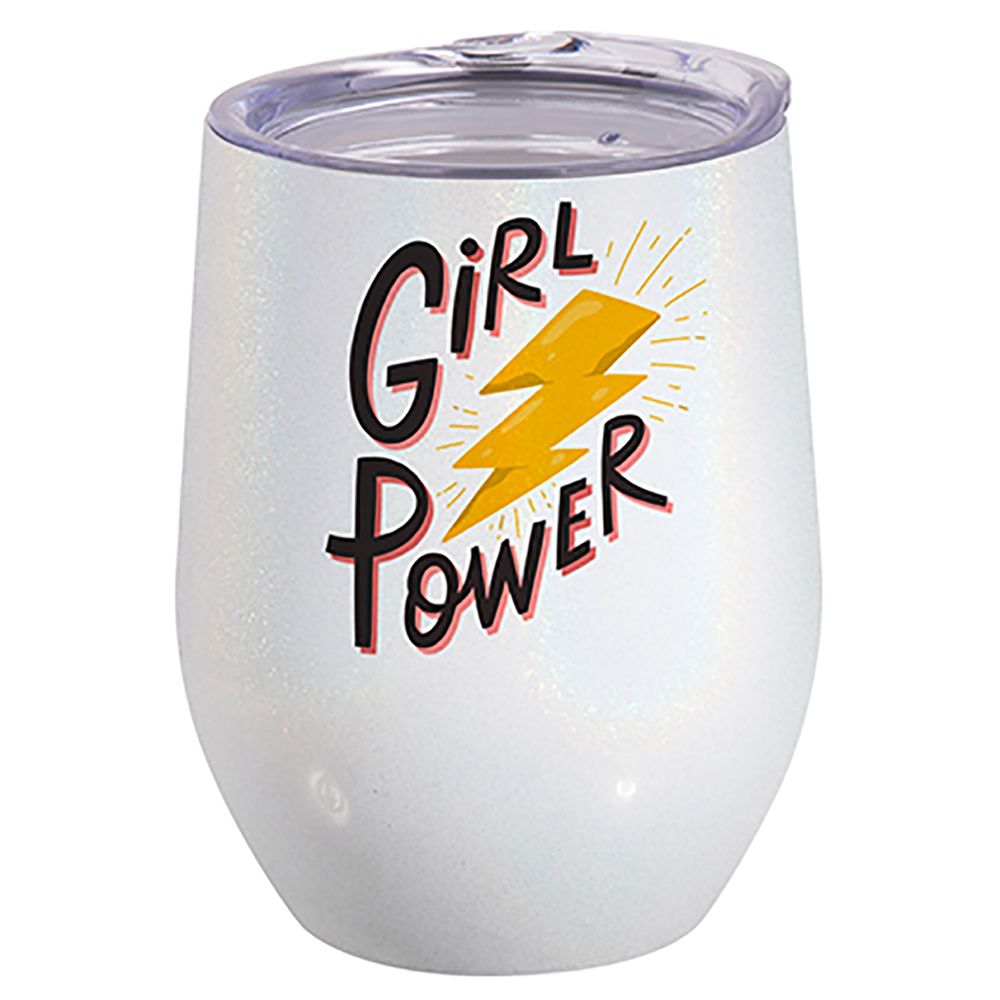
Whether it’s a cozy night in or a celebration, the White Glitter Stemless Wine Cup or the Silver Wine Tumbler add a touch of glam. For this substrate, use an Oven for 5 minutes at 350°F with a shrink wrap for even pressure.
5. 20oz Stainless Steel Rainbow Sparkle Bottle
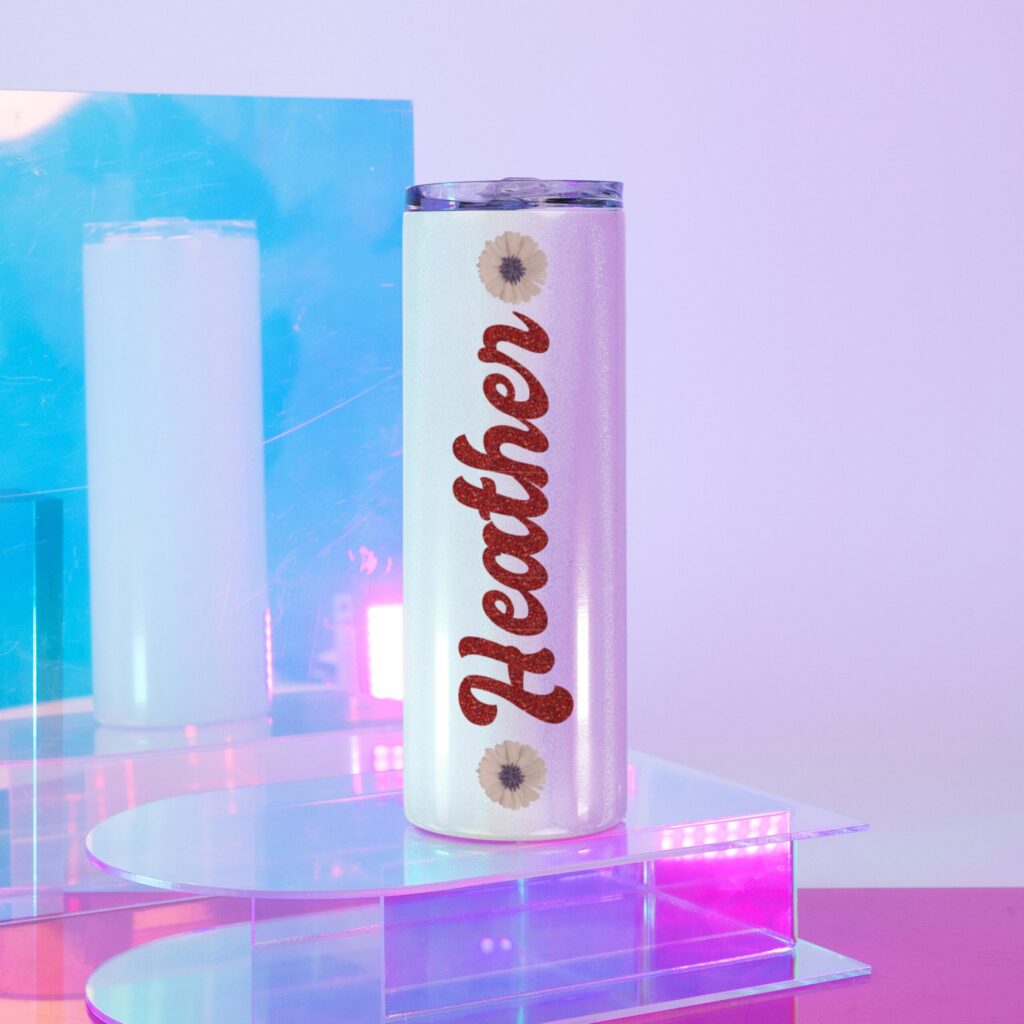
One of the most trendy substrates of the season. Stay hydrated in style with the Stainless Steel Rainbow Sparkle Bottle. A tumbler press for 80 seconds at 350°F with medium pressure is the ticket to a personalized work of art ready for any small business shop, bridal party, or gift for your bestie.
Why Choose Sawgrass Sublimation Printers?
Owning a Sawgrass SG500 or SG1000 sublimation printer opens a world of possibilities for your small business or crafting endeavors. These printers offer precision, color accuracy, and the ability to handle various substrates. With Sawgrass, you can create personalized gifts for the holidays, start your small business, and earn extra income. These printers were purpose built for sublimation and include self-maintenance features that help keep you printing with less maintenance that you need to do yourself.
Sublimation: The Special Touch
Sublimation is more than just printing; it’s the art of infusing your designs into substrates, creating vibrant, long-lasting prints. People love personalized items, and with sublimation, you can cater to that demand while expressing your creativity.
In this season of giving, make it extra special with the glitter, sequins, and sparkle of sublimation. Explore the magic of personalization with Sawgrass Ink – where every print tells a unique story. Happy Gift-Mas!
Understanding the Two Options
If you are reading this article, it is likely you are looking for more information to settle the confusion between the different types of cleanings that can be done on your Sawgrass Printer. You’ve probably wondered when you do each and what they accomplish. This will focus on the differences between the commonly used head clean, and the more involved head flush.
Performing a Head Cleaning
First, let’s discuss the head cleaning. This is a commonly used simple cleaning that can be done to help eliminate missing nozzles you see on your Nozzle check. One thing to understand is that the nozzle check is not a clean, but instead it is a diagnostic tool to check the health of your print head. The head clean is the actual cleaning that can be used if you have missing nozzles. We normally start with head cleans because it is the easiest, and gentlest, way to remove any ink that may be clogging your nozzles or lines.
With both the head clean and the head flush, you’ll specify which head you want to clean. The black and cyan nozzles are separate from the magenta and yellow nozzles. Though pushing ink through the head with these functions is normal, you don’t want to add extra stress to the print head by doing a clean or flush on a head that isn’t having issues. You can choose either head, or you can clean both if needed.
During the head cleaning your printer will say on the LCD screen that it is being performed. The head clean will generally use a small amount of ink for each clean and can be performed 2-3 times. If errors continue after that, then that would be when you will want to contact the care team to see whether the next step will be head flushes or something else.
Performing a Head Flush
The head flush is just as simple to perform as the head clean, but is a more involved process that cleans inside of the actual print head. The flush will “flood” your print head with ink to help remove any dried or congealed ink from the print head. This can be helpful for missing nozzles as well as for banding issues. Head flushes can be done up to 5 consecutive times, but most of the time you will not have to perform all 5 for issues to clear (remember if our care team asks you to do 5, then you should do all 5!). Each time you do a head flush the printer will clarify that you will want to do the flush as it says, “this will consume a considerable amount of ink” This amount is naturally about 4-5% of each cartridge. Yes, that is a significant amount of ink, but it’s NOT going to be 20-50% of a cartridge as some sources say. After each head flush, it is worth printing out another nozzle check to see if the issues have gone away.
The Difference
The easiest way for me to explain the difference is to think about it in terms of cleaning your carpets. A head clean is like vacuuming; it’s going to pick up any dirt or debris sitting on top of the carpet fibers or near the top. A head flush is more like using a carpet cleaner; it’s going to use a different process that allows the cleaning to go all the way to the bottom of the fiber to remove dirt. While a head clean will remove debris near that surface that would cause a clog; head flushes will thoroughly clean out the head and anything that may be caught.
That’s about it! Similar sounding cleans and functions, but one is more powerful than the other. If you are having any issues at all, do not hesitate to reach us at care.sawgrassink.com!
What you need to complete a feed belt cleaning
Cleaning a paper feed belt for the first time may seem like an intimidating process, but truthfully it is one of the easiest maintenance processes one can perform on their printer. Its simplicity stems from the few ingredients required as well as the fact that it requires removing nothing from the printer.
To begin, the first thing you need is a lint free cloth, like an eyeglass or screen cleaning cloth. You can also use a coffee filter instead and it works just as fine! The main reason you want to use something lint free rather than like a normal cleaning rag is so no fibers from the cloth are left over, like there would be with a tissue or rag or regular cloth. Lint free is always the way to go! The second thing you would need is Denatured Alcohol. If you are unable to get denatured alcohol, you can use 90% or higher Isopropyl alcohol instead.
Why a feed belt cleaning may be needed
The main purpose of this cleaning is to remove rollers marks or ink smearing on prints. This would normally appear as lines that are in the same place in all prints, but are not evenly spaced on the page. A dirty or damaged feed belt can also result in a SC 57000 error message. While cleaning the feed belt is a good troubleshooting step, it’s smart to include an inspection of the feed belt in your monthly maintenance. It’s a good idea once a month to check the feed belt for any dirt or lines. If you see a significant amount, you can go ahead and clean the belt. This will prevent issues later.
Completing a feed belt cleaning
The cleaning process is fairly simple to complete. The first step is to turn off and unplug the printer. This is to prevent the printer from thinking there is anything wrong as we perform the clean. Remember; it’s okay to turn the printer off to perform cleanings! We will be turning it back on once finished. Next, grab the Isopropyl and dab the lint free cloth, just enough to where it absorbs. The liquid, you don’t want it to be dripping soaked, but enough to where you can see it do the work. Open the top cover of the printer and wipe down the feed belt (The paper feed belt will look like a black shiny strip of film or plastic.) Now, take the lint-free cloth, add some alcohol to it and gently glide the cloth along the paper feed belt. There’s no need for too much pressure here as we don’t want to dent or scratch the belt. Remember to wipe it again with another lint-free cloth to remove excess moisture as well.
You’ll need to rotate the belt to clean all sections. We’ll need to access the back of the printer to rotate the belt. To open the rear door, press the two gray tabs inwards. You should now see some gray colored rollers. Once you have wiped and cleaned the visible part of the feed belt these rollers help rotate the paper feed belt. Gently press down on the gray rollers to rotate the paper feed belt but try not to slide the gray rollers back and forth as this can cause a paper misfeed. This will allow you to clean all parts of the feed belt and not just what is currently visible. Just like before once finished you can then repeat the same steps with the isopropyl, until the feed belt has been fully cleaned.
Once finished, close the back cover until it clicks into place and wait 15-30 minutes for the belt to completely dry. Just a note, these are two very important steps. If the latches to not click into place, you can end up with print skewing. If you turn on the printer and print before the belt is dry, then it can cause issues with your paper. It’s always best to let it thoroughly dry before using it!
A few tips and tricks
Remember when cleaning your feed belt that patience is key. You can always leave the printer off for an hour to be sure the belt is dry before printing too. Any eyewear section of a drugstore should have an eye glass cleaner or lint free cloth. Lastly, if the gray rollers slide out of place while you’re maneuvering them, make sure to place them back into place gently. Again, sliding them back and forth can cause a paper feed error so make sure you proceed with a gentle touch! With little pressure, you will feel the gray rollers located at the rear of the printer become unstuck.
That’s all the steps for cleaning your feed belt during trouble shooting or maintenance. Please reach out to our Care Team if you need further assistance. Happy Printing!
Skill Level: Intermediate
Tools & Supplies to Make It:
- MySawgrass+ Membership
- Sawgrass SG500 or SG1000 Printer
- Convection Oven
- Shrink Wrap
- 8.5”x11” or larger sublimation paper
- 34 oz Stainless Steel Tumbler
- Denatured Alcohol and a lint free cloth
- Heat Tape
How to Create It:
- For your product, select the 34oz Stainless Steel Travel Tumbler. It can be found under Drinkware.
- On the Create Your Design Panel, click on Designs. Click on the filter icon and then select Thank You and click apply.
- Choose the World’s Best design.
- To move your image to one side of the tumbler, use your mouse to lasso around the images and select them all as a group. Then, use the resize icon on the group to reduce the size. Use the move icon to slide your design to the correct place on the tumbler.
- Click on the text and using the text box in the left panel, change it to the name or title of whoever will be receiving the tumbler.
- To repeat the text on both sides of the tumbler, use your mouse to lasso around the images and select them all as a group. Then, click the duplicate button from the top row of the tool bar on the right.
- Move the new copy to where you want it and then use the preview button to check your alignment. Adjust as needed.
- When your design is finished, hit the Save & Print button to move to the product details page.
- You’ll be prompted to name your design, put it in a Category folder, and then then hit save.
- On the Product Detail page, you’ll give the project a name and add a description, then hit print.
How to Print It:
- You should get a popup that asks if you want to open Sawgrass Print Utility. You will need to click Open Sawgrass Print Utility. If you are not seeing this, you’ll need to disable your popup blocker.
- In the Sawgrass Print Utility, start by scrolling down and making sure your print orientation is set to Landscape.
- For this project, you can use the preset Stainless Steel Tumbler.
- Make sure that the media size and type match what you have in the printer. On the Color Management Tab, we suggest having the Color Mode set to Vibrant.
- When you’ve confirmed all of your settings, Hit Print.
How to Press It:
- Turn your press on and set the temperature to 380 degrees and the time to 480 seconds.
- Prepare your tumbler by using denatured alcohol on a lint free cloth to remove any dust or fibers.
- Wrap your design around the tumbler and tape it tightly in place with heat resistant tape.
- Place the tumbler in a shrink wrap bag and use a heat gun to create pressure.
- Place your item in the oven.
- Close the door and wait 480 seconds before opening the oven and removing the tumbler.
Tips & Tricks:

- For items in the convention oven, remove the shrink wrap and paper as soon as possible. This makes it easier to remove and less likely to stick.
- Fill the tumbler with candy, gift cards, and other treats to make it even more special.
Skill Level: Basic
Tools & Supplies to Make It:
- MySawgrass+ Membership
- Sawgrass SG500 or SG1000 Printer
- 15”x15” or larger Flat Press
- 8.5” x 14” or larger sublimation paper
- Plywood Placemat
- Denatured alcohol and a lint free cloth
- Heat Tape
- Blowout Paper
How to Create It:
- Log into MySawgrass and from the Landing Page choose Design.
- For your product, select the Plywood Placemat. It can be found under Home Decor.
- On the Create Your Design Panel, click on Designs. Click on the filter icon and then select Christmas and click apply.
- Choose the Treats for Santa design.
- The image seems to be sized perfectly for the area, but if you wanted to reduce or enlarge the image size, use your mouse to lasso around the images and select them all as a group. Then, use the resize icon on the group to reduce the size. It should stay centered.
- You can change any text by clicking on the text and then using the text box on the left to change it.
- When your design is finished, hit the Save & Print button to move to the product details page.
- You’ll be prompted to name your design, put it in a Category folder, and then then hit save.
- On the Product Detail page, you’ll give the project a name and add a description, then hit print.
How to Print It:
- You should get a popup that asks if you want to open Sawgrass Print Utility. You will need to click Open Sawgrass Print Utility. If you are not seeing this, you’ll need to disable your popup blocker.
- In the Sawgrass Print Utility, start by scrolling down and making sure your print orientation is set to Landscape.
- For this project, you can use the preset Hardboard Sign/Plaque.
- Make sure that the media size and type match what you have in the printer.
- On the Color Management Tab, we suggest having the Color Mode set to Vibrant.
- When you’ve confirmed all of your settings, Hit Print.
How to Press It:
- Turn your press on and set the temperature to 400 degrees and the time to 60 seconds. Pressure should be medium.
- Prepare your placemat by using denatured alcohol on a lint free cloth to remove any fibers or dust.
- Place your design face down on the placemat and tape it down.
- Place the placemat on the lower platen of the press with the printed page on top.
- Place a piece of blowout paper on top.
- Close the press and wait 45 seconds before opening the press and removed the printed placemat.

Tips & Tricks:
- Always check your blanks for a plastic film. This blank often has one, and it should be removed before pressing. It helps keep the surface clean and eliminates the need to wipe it with alcohol.
- Though this is a little long for letter paper, you could make this work on an SG500 by extending the paper tray to accommodate legal paper or by moving your design in slightly to fit on your letter paper.
Follow along as we make this in English and in Spanish!
Skill Level: Basic
Tools & Supplies to Make It:
- MySawgrass+ Membership
- Sawgrass SG500 or SG1000 Printer
- 15”x15” or larger Flat Press
- 8.5” x 11” or larger sublimation paper
- Ceramic Ornament
- Denatured alcohol and a lint free cloth
- Heat Tape
- Blowout Paper
How to Create It:
- Log into MySawgrass and from the Landing Page choose Design.
- For your product, select the 3” Circle Ceramic Ornament. It can be found under Holiday.
- On the Create Your Design Panel, click on Designs. Click on the filter icon and then select Christmas and click apply.
- Choose the Treats for Santa design.
- To reduce the image size, use your mouse to lasso around the images and select them all as a group. Then, use the resize icon on the group to reduce the size. It should stay centered.
- To change the text color, with the elements selected, click on the black swatch on the left panel. Then, go below and find the color you’d like for the text. We used white, which is hex code FFFFFF.
- Add a background by selecting Elements on the Create Your Design panel, and then going to backgrounds. We used Hex Code e50e19.
- To add a photo to the other side, choose Side 2 from the bottom panel. Choose Upload file and then Upload image.
- Browse for the image you want on your computer and then add it.
- When your design is finished, hit the Save & Print button to move to the product details page.
- You’ll be prompted to name your design, put it in a Category folder, and then then hit save.
- On the Product Detail page, you’ll give the project a name and add a description, then hit print.
How to Print It:
- You should get a popup that asks if you want to open Sawgrass Print Utility. You will need to click Open Sawgrass Print Utility. If you are not seeing this, you’ll need to disable your popup blocker.
- For this project, you can use the preset Ceramic Coaster.
- Make sure that the media size and type match what you have in the printer.
- On the Color Management Tab, we suggest having the Color Mode set to Vibrant.
- In the Design Files section, add spacing to give the two sides distance to make it easier to cut them apart for sublimation.
- When you’ve confirmed all of your settings, Hit Print.
How to Press It:
- Turn your press on and set the temperature to 400 degrees and the time to 120 seconds. Pressure should be light.
- Prepare your ornament by using denatured alcohol on a lint free cloth to remove any fibers or dust.
- Place your design face down on the one side of the ornament and tape it down.
- Place the ornament on the lower platen of the press with the printed page on top.
- Place a piece of blowout paper on top.
- Close the press and wait 120 seconds before opening the press and removed the printed ornament.
- When cool enough to touch. Flip ornament over and repeat the process for the other side.

Tips & Tricks:
- Light pressure is a must for ceramics to prevent cracking. Though a silicone pad is not required, one can help protect the ornament while pressing.
- Ornaments make a great name tag for a gift. You can date them, so each recipient has their own collection of ornaments from you that they receive through the years.
Skill Level: Intermediate
Tools & Supplies to Make It:
- MySawgrass+ Membership
- Sawgrass SG500 or SG1000 Printer
- Convection Oven
- Shrink Wrap
- 8.5”x11” or larger sublimation paper
- Enamel Coffee Mug
- Denatured Alcohol and a lint free cloth
- Heat Tape
How to Create It:
- Log into MySawgrass and from the Landing Page choose Design.
- For your product, select the 12oz Enamel Mug. It can be found under Drinkware.
- On the Create Your Design Panel, click on Designs. Click on the filter icon and then select Christmas and click apply.
- Choose the Cup of Cheer design.
- To move your image to one side of the cup, use your mouse to lasso around the images and select them all as a group. Then, use the resize icon on the group to reduce the size. Use the move icon to slide your design to the correct place on the mug.
- To have the design on both sides of the cup, with the image selected, click the duplicate button from the top row of the tool bar on the right.
- Move the new copy to where you want it and then use the preview button to check your alignment. Adjust as needed.
- When your design is finished, hit the Save & Print button to move to the product details page.
- You’ll be prompted to name your design, put it in a Category folder, and then then hit save.
- On the Product Detail page, you’ll give the project a name and add a description, then hit print.
How to Print It:
- You should get a popup that asks if you want to open Sawgrass Print Utility. You will need to click Open Sawgrass Print Utility. If you are not seeing this, you’ll need to disable your popup blocker.
- In the Sawgrass Print Utility, start by scrolling down and making sure your print orientation is set to Landscape.
- For this project, you can use the preset Stainless Steel Tumbler.
- Make sure that the media size and type match what you have in the printer. On the Color Management Tab, we suggest having the Color Mode set to Vibrant.
- When you’ve confirmed all of your settings, Hit Print.
How to Press It:
- Turn your press on and set the temperature to 380 degrees and the time to 480 seconds.
- Prepare your tumbler by using denatured alcohol on a lint free cloth to remove any dust or fibers.
- Wrap your design around the cup and tape it tightly in place with heat resistant tape.
- Place the cup in a shrink wrap bag and use a heat gun to create pressure.
- Place your item in the oven.
- Close the door and wait 480 seconds before opening the oven and removing the mug.

Tips & Tricks:
- For items in the convention oven, remove the shrink wrap and paper as soon as possible. This makes it easier to remove and less likely to stick.
- This can also be done in a mug press. Because of the lip on the enamel mug, you can use a silicone wrap to complete an even surface. You would then drop this into the mug press upside down.