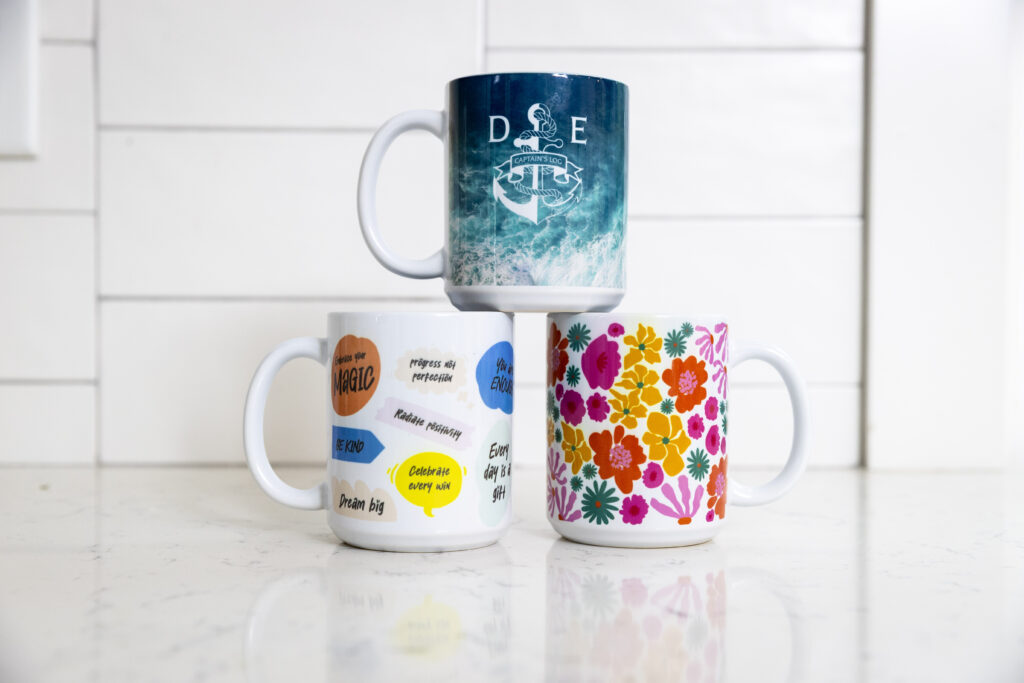
Smart strategies to maximize ROI with your Sawgrass system
When you invest in a Sawgrass printer, you are investing in business growth. Whether you print custom t-shirts, mugs, keychains, or promotional products, one goal drives profitability: reduce waste, improve efficiency, and increase profit.
In this workshop recap, Sawgrass Education Manager Rhonda shares simple, practical strategies to help you improve your return on investment by reducing waste across your workflow, from design to printing to pressing.
Why reducing waste matters for ROI
Every reprint costs money. It also costs time you could spend fulfilling orders. Reprints can use:
- Ink
- Sublimation paper
- Blanks
- Production time
- Profit
When you reduce waste, you improve your ROI because you:
- Increase profit margins
- Improve production efficiency
- Extend the life of your printer
- Pay off your Sawgrass system faster
If you want to reduce waste and increase profit with Sawgrass, start by tightening the steps that cause the most reprints.
Why choose Sawgrass in the maker market
If you are comparing Sawgrass with Epson or other options, consider what matters when you are running a customization business. You need consistent output and a repeatable workflow that helps you deliver sellable results without constant trial and error.
Sawgrass is built for decoration and production workflows. That helps you reduce waste, avoid reprints, and protect your margins as you grow.
Use ganging and nesting to maximize paper usage
One of the easiest ways to reduce sublimation paper waste is by using ganging and nesting in the Sawgrass Print Utility. You fit more designs on each page and cut down on unused space.
What is nesting
Nesting means placing multiple copies of the same design on one sheet.
Use nesting for small items like:
- Keychains
- Magnets
- Earrings
- Small patches
Ways nesting reduces waste:
- Add multiple copies to one page
- Crop excess white space
- Adjust spacing
- Rotate to landscape when needed
- Use more of the printable area
What is ganging
Ganging means placing different designs on the same page, as long as they are going onto the same type of product so the color profile matches.
Example:
- 1 keychain design
- 2 magnet designs
- 3 small tags
This works well for small batch orders and mixed custom sets.
Bonus tip: use the Recents folder
The Sawgrass Print Utility saves jobs in your Recents folder. That means you can open and reprint without rebuilding layouts. Less setup time supports higher profit.
Choose high quality blanks to avoid costly reprints
Cheap blanks often lead to uneven results, which leads to reprints. Low quality blanks can cause:
- Uneven poly coatings
- Flaking finishes
- Warping in the press
- Poor color transfer
- Inconsistent quality
High quality sublimation blanks are designed for sublimation and typically provide more consistent coatings and more reliable transfers. When blanks fail, you waste the blank, the paper, the ink, and your time.
Blanks where quality matters most include:
- Wind spinners
- Glitter drinkware
- Coasters
- Wood surfaces
Be smart about fabric choices, especially for VersiFlex
If you are using VersiFlex or pressing cotton garments, watch for fabrics that shift during pressing. Some dyes react to heat and can create inconsistent results.
Common trouble spots include:
- Heathered colors
- Ash tones
- Certain cotton brands
If you see color shifting, test another brand before producing a full order.
Pro tip: keep scrap fabric for testing
Testing on scrap reduces waste. Keep:
- 100 percent polyester scraps for sublimation testing
- 100 percent cotton scraps for VersiFlex testing
Keep your Sawgrass printer turned on
This is a built-in way to reduce waste. Sawgrass printers perform automatic self-maintenance cycles every 10 to 12 hours when not actively in use.
These cycles help keep ink moving. When ink sits too long, particles can settle, lines can clog, and print quality can suffer. Poor print quality often leads to reprints.
Best practices:
- Leave the printer plugged in
- Leave the printer turned on
- Only unplug when necessary, such as storms, moving, or trade shows
- Plug it back in immediately afterward
Printers left off for long periods are more likely to develop clogging issues.
Always check ink expiration dates
Expired ink can increase the risk of:
- Clogging
- Color inconsistencies
- Print defects
Using in-date Sawgrass ink helps protect print quality, printer health, and your profit margin.
Use the Sawgrass ROI calculator to set sales goals
Want to estimate how quickly your printer can pay for itself? Use the Sawgrass ROI Calculator on the Sawgrass website.
Example goals:
- Print and sell 50 custom t-shirts
- Print and sell 72 custom mugs
- Offer small batch personalized products for local schools, teams, and businesses
Reducing waste plus steady production can shorten your payoff timeline.
Small changes that create big profit
Here is a quick recap of how to reduce waste and increase profit with Sawgrass:
- Use ganging and nesting in the Print Utility
- Crop artwork to reduce excess white space
- Rotate layouts to use more of the page
- Choose high quality sublimation blanks
- Test fabrics before full production
- Keep your printer powered on for maintenance cycles
- Use in-date Sawgrass inks
- Save and reuse print jobs
Every sheet of paper saved and every reprint avoided improves ROI.
Final thoughts
Reducing waste is about more than efficiency. It is about protecting your margins. When you print smarter, use quality materials, and maintain your equipment properly, you protect your investment and grow your business faster.
Ready to reduce waste and increase profit with Sawgrass? Start with your next print job.
Need help
The Sawgrass Education Team is here to support you.
- Visit care.sawgrassink.com for technical support
- Join workshops on Wednesdays at 2:00 PM Eastern hosted live on Youtube
- Watch tutorials on the Sawgrass YouTube channel
- Listen to the Ink Differently podcast on Spotify, Amazon Music, or Apple Music
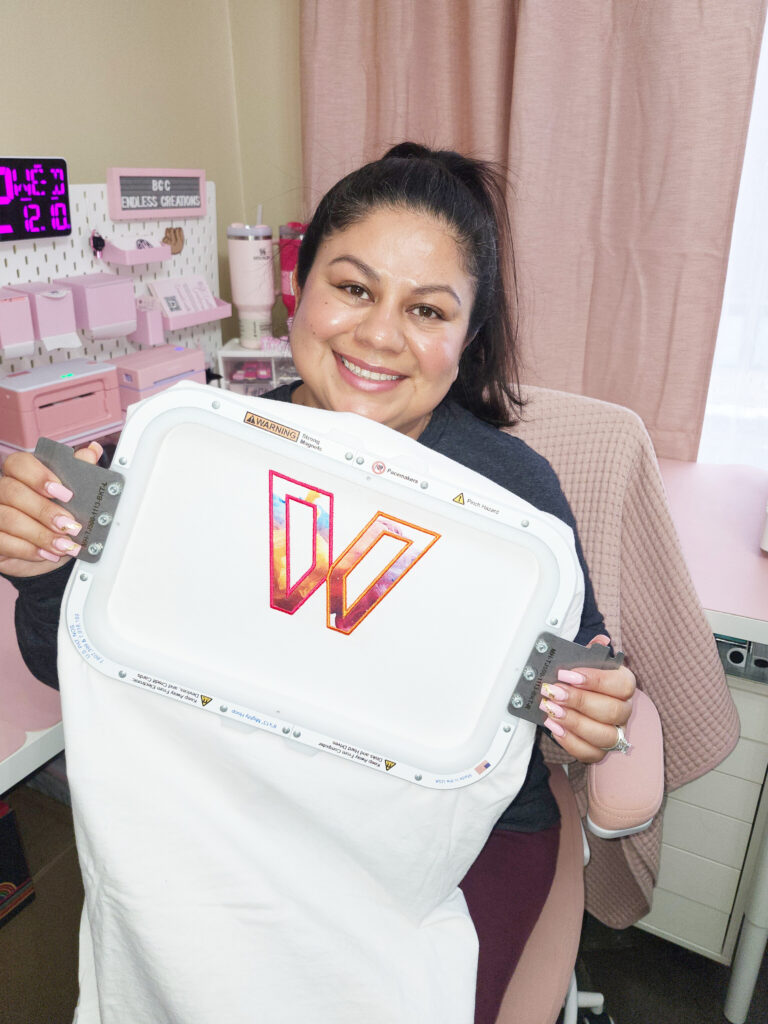
Adding the Sawgrass VersiFlex system to my workspace at BGC Endless Creations has been a total game-changer for my embroidery business.
I’ve always loved appliqué embroidery, and cotton is my favorite fabric to stitch on. But finding the perfect shade or pattern in stores can be surprisingly hard—especially when a customer wants a very specific color match.
With VersiFlex, I can create the look I need on demand. I design the artwork, print it, press it onto cotton, and then stitch my appliqué like usual. That means I can match colors and patterns for each order without hunting all over town for “close enough.”
What’s surprised me most is how much I’ve been able to expand beyond embroidery materials. With the right workflow, VersiFlex opens the door to decorating natural fabrics (like cotton) as well as uncoated surfaces like wood and stone—and I can still create classic sublimation projects like mugs and tumblers when I want to.
My workflow now looks like this:
Design → Print → Press → Peel → Stitch.
It’s fast, consistent, and the transfers are easy to work with—no trimming or weeding around the design.
Before VersiFlex, I spent so much time searching for the right fabric color or pattern. Now I spend that time creating. I can deliver more personalized projects, turn orders around faster, and confidently say “yes” to ideas that used to feel out of reach.
For my small business, that’s everything. If you’re a small business owner, a creative entrepreneur, or you love making custom projects, VersiFlex is absolutely worth a look.
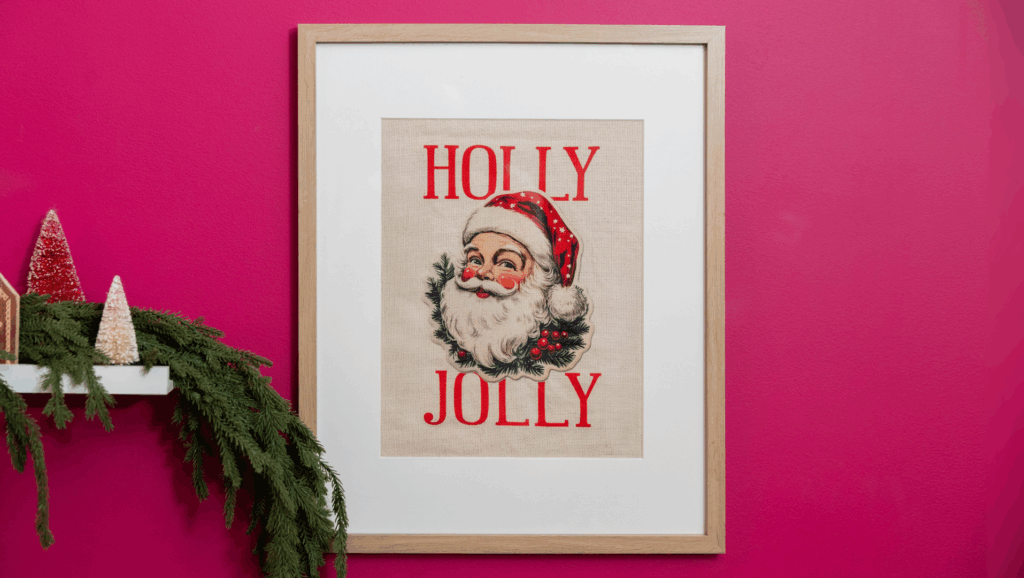
Featuring a classic Santa design and warm, heritage-inspired details, this project captures the spirit of Christmas past. With Sawgrass VersiFlex, you can easily create a high-quality canvas print that adds timeless cheer to any space.
Skill Level: Beginner
Tools & Supplies:
- MySawgrass+ Subscription
- SG500 or SG1000
- VersiFlex Inks
- VersiFlex Light Paper
- Flat Press
- Pre-Cut 11×14 Canvas Fabric or Duck Cloth
- Blowout Paper
How To Create It:
- Click the DESIGN button on your MySawgrass dashboard.
- Select Custom Canvas: Rectangle 7.25” x 11.25”
- Select Your Design: Holly_Jolly_Vintage_Santa_Canvas
- Size to fit canvas.
- Send your ready to design to print utility by clicking PRINT.
How To Print It:
- Select your ready printer loaded with Sawgrass VersiFlex inks.
- Select the Canvas preset, or select Natural Fabrics (Burlap, Canvas Linen) as the product.
- Load printer with VersiFlex Light paper.
- Click Print.
How To Press It:
- Temperature: 375°F
- Temperature: 30 seconds
- Pressure: High
- Position your fabric onto the base of your heat press.
- Prepress your fabric for 10-15 seconds to release moisture. If you see steam when releasing the press, press again until the steam disappears.
- While the print is still slightly tacky, place your print face down onto the center of the fabric. Do not reposition your print once you have it placed.
- Place a piece of protective blowout paper over your print to protect your heat press from any excess ink.
- Press for 30 seconds at 375°F at high pressure.
- When the timer sounds, open your press and peel your print immediately. Delayed peeling will cause the paper to stick.
- Place the blowout paper back over the printed fabric and press for another 10 seconds to seal the print.
Tips & Tricks
- Choose an ivory or cream fabric for a more vintage look.
- Select a 16” x 20” frame paired with an 11” x 14” mat to showcase your design beautifully and create stunning, gallery-quality wall décor.
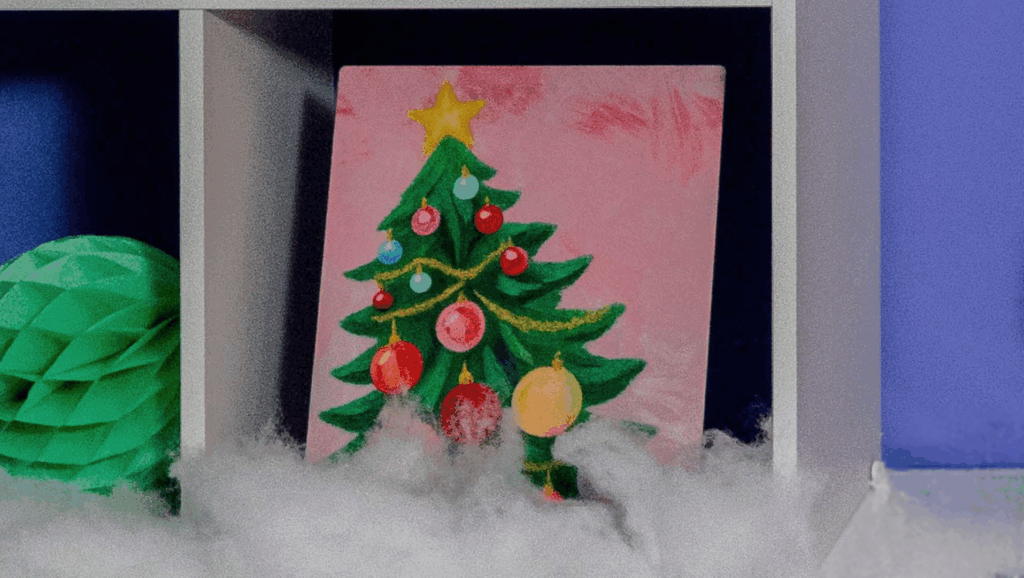
Skill Level: Beginner
Tools & Supplies:
- MySawgrass+ Subscription
- SG500 or SG1000
- VersiFlex Inks or Sublijet UHD Inks
- Truepix Classic Paper
- 8” x 10” Chromaluxe Metal Panel
- Flat Press
- Heat Tape
How To Create It:
- Click the DESIGN button on your MySawgrass dashboard.
- Select Custom Canvas: 8” x 10” with .125” bleed
- Select Your Design: Merry_Bright_Tree_Photo_Panel
- Size to fit canvas.
- Send your ready to design to print utility by clicking PRINT.
How To Print It:
- Select your ready printer.
- Select Metal as the product.
- Load printer with Truepix Classic Paper
- Click Print.
How To Press It:
- Temperature: 400°F
- Temperature: 60 seconds
- Pressure: High
- Place your print face up on a table or a secure work surface.
- Place the panel face down onto the print.
- Secure with heat-resistant tape.
- Carefully flip and place on the base of the press paper side up.
- Place a piece of protective blowout paper under your product to protect your heat press from any excess ink.
- Press for 60 seconds at 400°F at high pressure.
- When the timer sounds, open your press and peel your print. Be careful, product will be hot. Use a glove or let the product cool before peeling.
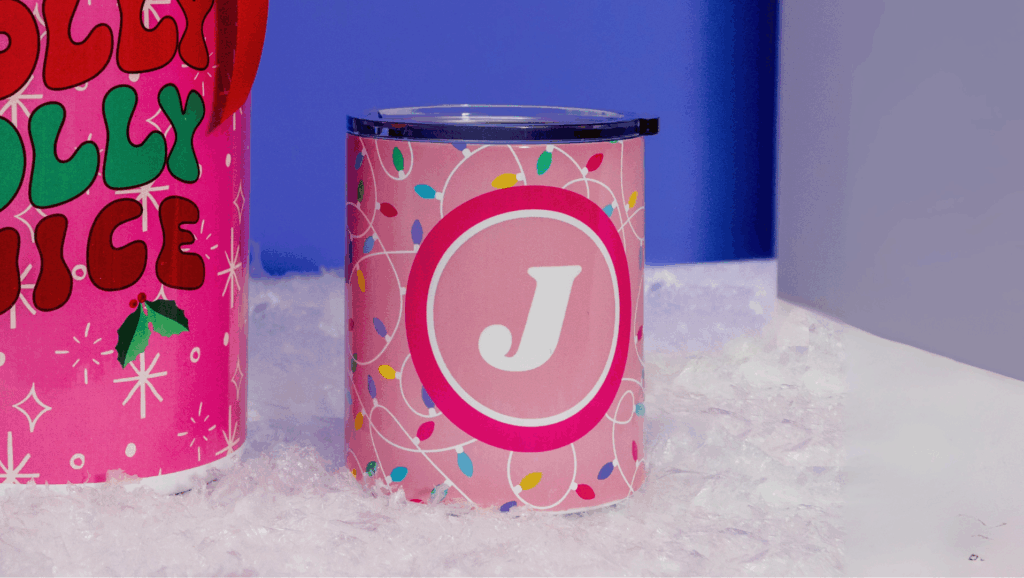
Skill Level: Intermediate
Tools & Supplies:
- MySawgrass+ Subscription
- SG1000
- VersiFlex Inks or Sublijet UHD Inks
- Truepix Classic Paper
- 10oz Stainless Steel Lowball Tumbler
- Mug Press
- Heat Tape
How To Create It:
- Click the DESIGN button on your MySawgrass dashboard.
- Select Product: 10oz Stainless Steel Lowball Tumbler
- Select Your Design: Merry_Bright_Lights_Tumbler
- Size to fit canvas, personalize with your initial.
- Send your ready to design to print utility by clicking PRINT.
How To Print It:
- Select your ready printer.
- Select Stainless Steel as the product.
- Load printer with Truepix Classic Paper
- Click Print.
How To Press It:
- Temperature: 365°F
- Temperature: 60-90 seconds
- Pressure: High
- Trim your paper down to the print area.
- Wrap your paper around the tumbler with print side facing the mug.
- Secure with heat-resistant tape.
- Place your tumbler into your mug press and press.
- Press for 60-90 seconds at 365°F
- When the timer sounds, open your press and peel your print. Be careful, product will be hot. Use a glove or let the product cool before peeling.
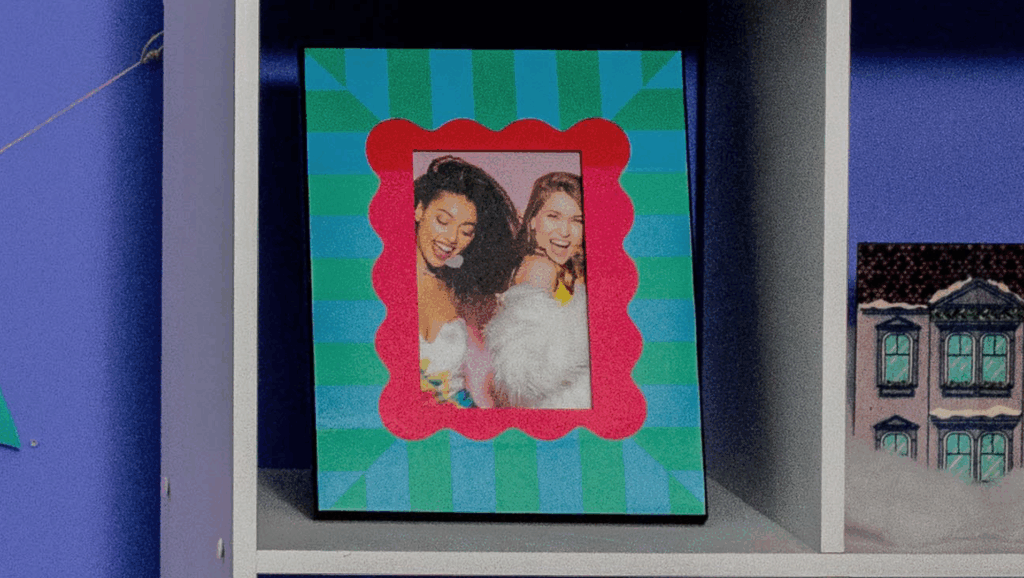
Skill Level: Beginner
Tools & Supplies:
- MySawgrass+ Subscription
- SG500 or SG1000
- VersiFlex Inks or Sublijet UHD Inks
- Truepix Classic Paper
- 8” x 10” Hardboard Photo Frame
- Flat Press
- Heat Tape
How To Create It:
- Click the DESIGN button on your MySawgrass dashboard.
- Select Product: 8” x 10” MDF Picture Frame
- Select Your Design: Merry_Bright_Geometric_Frame
- Size to fit canvas.
- Send your ready to design to print utility by clicking PRINT.
How To Print It:
- Select your ready printer.
- Select MDF Board as the product.
- Load printer with Truepix Classic Paper
- Click Print.
How To Press It:
- Temperature: 400°F
- Temperature: 60 seconds
- Pressure: High
- Place your print face up on a table or a secure work surface.
- Place the frame face down onto the print.
- Secure with heat-resistant tape.
- Carefully flip and place on the base of the press paper side up.
- Place a piece of protective blowout paper under your product to protect your heat press from any excess ink.
- Press for 60 seconds at 400°F at high pressure.
- When the timer sounds, open your press and peel your print. Be careful, product will be hot. Use a glove or let the product cool before peeling.
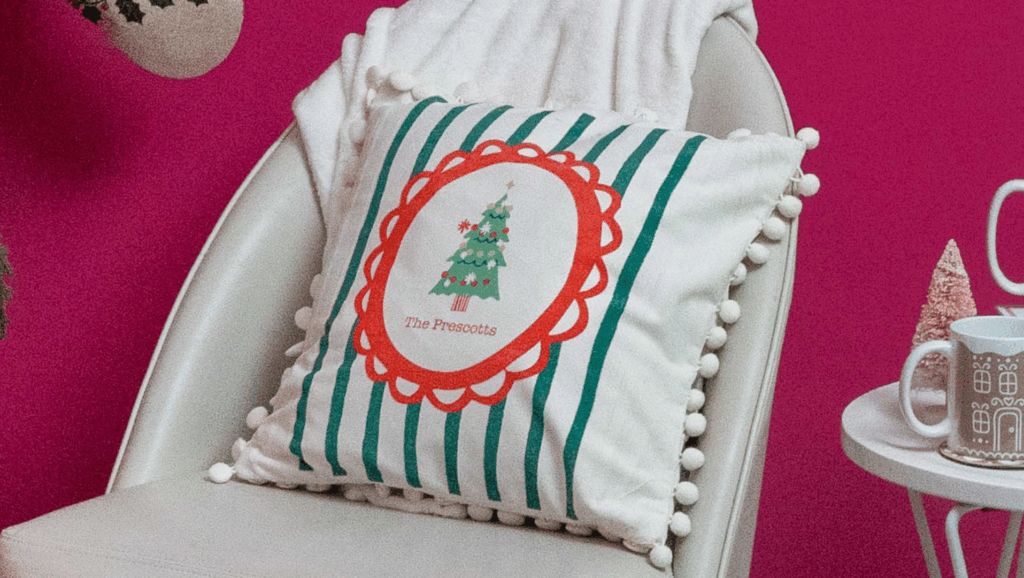
Personalize it with your family name using Sawgrass VersiFlex, creating a cozy, cheerful accent that makes your holiday décor truly one-of-a-kind.
Skill Level: Intermediate
Tools & Supplies:
- MySawgrass+ Subscription
- SG1000
- VersiFlex Inks
- VersiFlex Light Paper
- Flat Press
- 16” Fabric Pillow Cover
- Pressing Pad
- Blowout Paper
How To Create It:
- Click the DESIGN button on your MySawgrass dashboard.
- Select Product: 15.75” Linen Pillow Cover – Full Print
- Select Your Design: Holly_Jolly_Custom_Tree
- Size to fit canvas, personalize with your family name.
- Send your ready to design to print utility by clicking PRINT.
How To Print It:
- Select your ready printer loaded with Sawgrass VersiFlex inks.
- Select the Burlap, Canvas, Cotton or Linen preset based on your pillow, or select Cotton or Natural Fabrics (Burlap, Canvas Linen) as the product.
- Load printer with VersiFlex Light paper.
- Click Print.
How To Press It:
- Temperature: 375°F
- Temperature: 30 seconds
- Pressure: High
- Position your pillow onto the base of your heat press.
- Prepress your fabric for 10-15 seconds to release moisture. If you see steam when releasing the press, press again until the steam disappears.
- While the print is still slightly tacky, place your print face down onto the center of the pillow. Do not reposition your print once you have it placed.
- Place a piece of protective blowout paper over your print to protect your heat press from any excess ink.
- Press for 30 seconds at 375°F at high pressure.
- When the timer sounds, open your press and peel your print immediately. Delayed peeling will cause the paper to stick.
- Place the blowout paper back over the printed fabric and press for another 10 seconds to seal the print.
- Stuff final pillow with a pillow insert or pillow stuffing.
Tips & Tricks
- If your pillow cover has a thick seam or trim, stuff the pillow with a pressing pad before pressing to make sure you get even pressure across the full pillow.
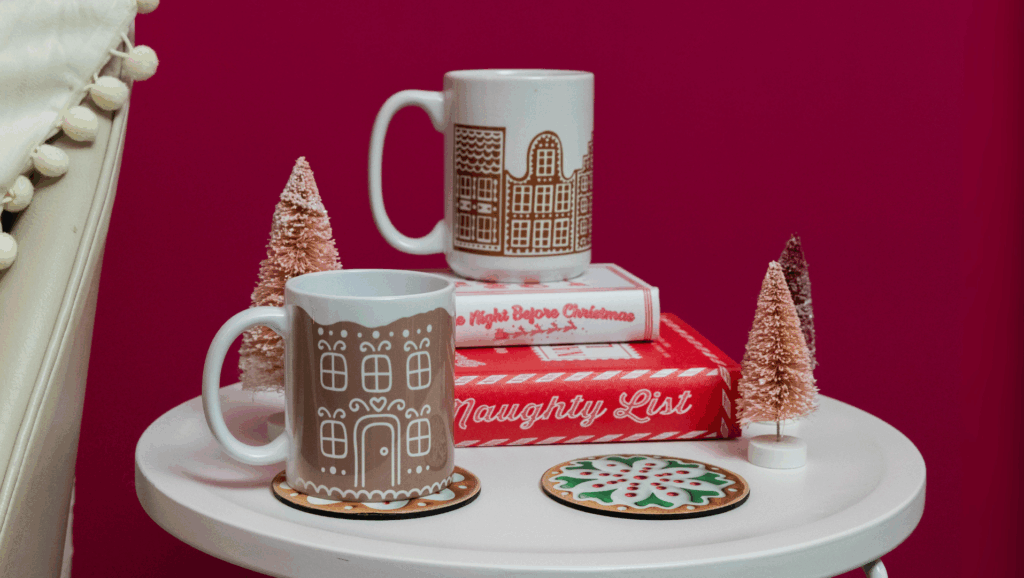
Skill Level: Beginner
Tools & Supplies:
- MySawgrass+ Subscription
- SG500 or SG1000
- VersiFlex Inks or Sublijet UHD Inks
- Truepix Classic Paper
- 15oz Ceramic Mug
- 11oz Ceramic Mug
- Mug Press
- Heat Tape
How To Create It:
For the 15oz Mug
- Click the DESIGN button on your MySawgrass dashboard.
- Select Product: 15oz Ceramic Mug
- Select Your Design: B201D_Gingerbread_Village_Mug
- Size to fit canvas.
- Send your ready to design to print utility by clicking PRINT.
For The 11oz Mug:
- Click the DESIGN button on your MySawgrass dashboard.
- Select Product: 11oz Ceramic Mug
- Select Your Design: B101D_Gingerbread_House_Mug
- Size to fit canvas.
- Send your ready to design to print utility by clicking PRINT.
How To Print It:
- Select your ready printer.
- Select Ceramic as the product.
- Load printer with Truepix Classic Paper
- Click Print.
How To Press It:
- Temperature: 350-400°F
- Temperature: 150-300 seconds
- Pressure: High
- Trim your paper down to the print area.
- Wrap your paper around the mug with print side facing the mug.
- Secure with heat-resistant tape.
- Place your mug into your mug press and press.
- Press for 150-300 seconds at 350-400°F
- When the timer sounds, open your press and peel your print. Be careful, product will be hot. Use a glove or let the product cool before peeling.
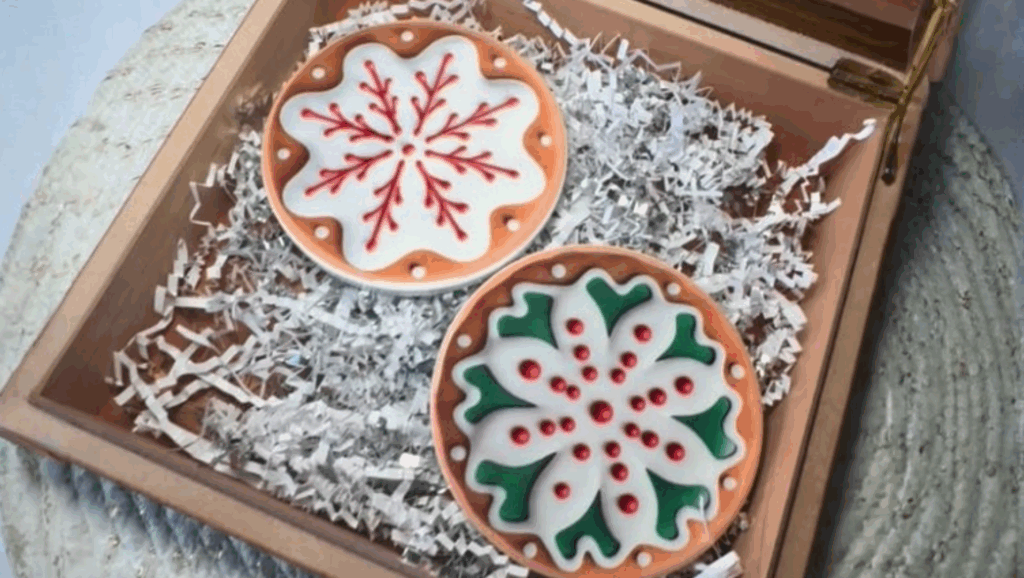
Skill Level: Intermediate
Tools & Supplies:
- MySawgrass+ Subscription
- SG500 or SG1000
- VersiFlex Inks or Sublijet UHD Inks
- Truepix Classic Paper
- Sublimation Leather Round Coasters
- Flat Press
- Blowout Paper
- Heat Tape
How To Create It:
- Click the DESIGN button on your MySawgrass dashboard.
- Select Product: Leather Round Coaster
- Select Your Element: Gingerbread_Round_Cookie_01, Gingerbread_Round_Cookie_02
- Size to fit canvas.
- Send your ready to design to print utility by clicking PRINT.
How To Print It:
- Select your ready printer.
- Select Vegan Leather as the product.
- Load printer with Truepix Classic Paper
- Click Print.
How To Press It:
- Temperature: 375°F
- Temperature: 30 seconds
- Pressure: Medium
- Place your print face up on a table or a secure work surface.
- Place the leather coaster face down onto the print.
- Secure with heat-resistant tape.
- Carefully flip and place on the base of the press paper side up.
- Place a piece of protective blowout paper under your product to protect your heat press from any excess ink.
- Press for 30 seconds at 375°F at medium pressure.
- When the timer sounds, open your press and peel your print. Be careful, product will be hot. Use a glove or let the product cool before peeling.
Tips & Tricks
- Print and press multiple coasters at once to maximize paper and save time.
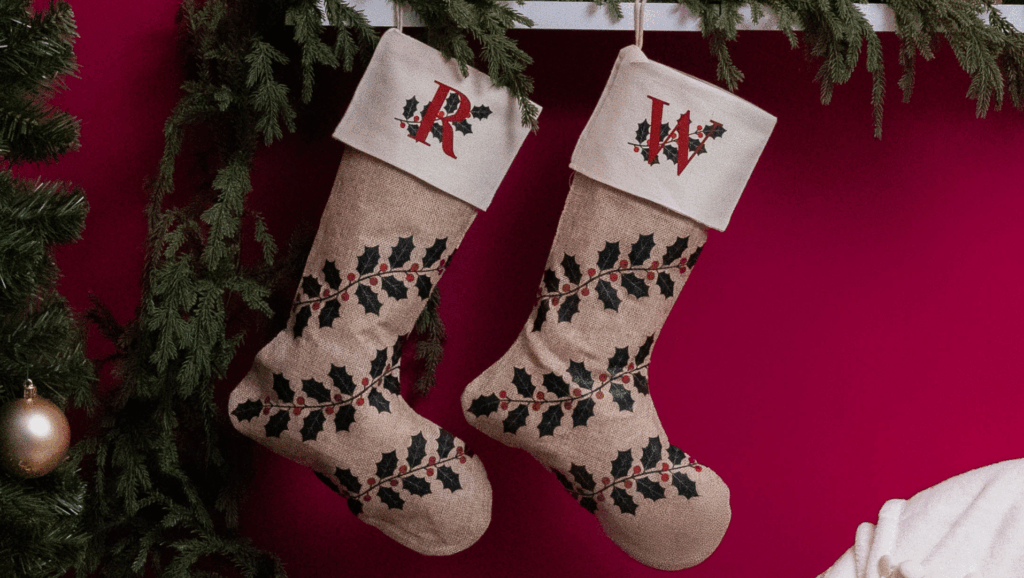
Featuring cheerful holiday designs and a personalized monogram, this project is the perfect blend of classic and custom. Made with Sawgrass VersiFlex, it’s easy to add bright, durable details that make your mantel merry and bright.
Skill Level: Advanced
Tools & Supplies:
- MySawgrass+ Subscription
- SG1000
- VersiFlex Inks
- VersiFlex Light Paper
- Flat Press
- Burlap or Fabric Stocking
- Blowout Paper
How To Create It:
For The Cuff:
- Click the DESIGN button on your MySawgrass dashboard.
- Select Custom Canvas: Rectangle 2.75” x 2”
- Select Your Design: Holly_Jolly_Initial
- Size to fit canvas, personalize with your desired initial.
- Send your ready to design to print utility by clicking PRINT.
For The Foot:
- Click the DESIGN button on your MySawgrass dashboard.
- Select Custom Canvas: Rectangle 10.75” x 10.5”
- Select Your Design: Holly_Jolly_Laurel_Stack
- Size to fit canvas.
- Send your ready to design to print utility by clicking PRINT.
How To Print It:
For The Cuff:
- Select your ready printer loaded with Sawgrass VersiFlex inks.
- Select the Burlap preset, or select Natural Fabrics (Burlap, Canvas Linen) as the product.
- Load paper with VersiFlex Light paper.
- Click Print.
For The Foot:
- Select your ready printer loaded with Sawgrass VersiFlex inks.
- Select the Burlap preset, or select Natural Fabrics (Burlap, Canvas Linen) as the product.
- Load printer with VersiFlex Light paper.
- Click Print.
How To Press It:
- Temperature: 375°F
- Temperature: 30 seconds
- Pressure: High
For The Cuff:
- Position the top of your stocking onto the base of your heat press.
- Prepress your fabric for 10-15 seconds to release moisture. If you see steam when releasing the press, press again until the steam disappears.
- While the print is still slightly tacky, place your print face down onto the center of the cuff. Do not reposition your print once you have it placed.
- Place a piece of protective blowout paper over your print to protect your heat press from any excess ink.
- Press for 30 seconds at 375°F at high pressure.
- When the timer sounds, open your press and peel your print immediately. Delayed peeling will cause the paper to stick.
- Place the blowout paper back over the printed fabric and press for another 10 seconds to seal the print.
For The Foot:
- Position the sock of your stocking onto the base of your heat press.
- Prepress your fabric for 10-15 seconds to release moisture. If you see steam when releasing the press, press again until the steam disappears.
- While the print is still slightly tacky, place your print face down onto the foot with the corners of the middle holly laurel angled to touch the inside curve and outside heel of the foot. Do not reposition your print once you have it placed.
- Place a piece of protective blowout paper over your print to protect your heat press from any excess ink.
- Press for 30 seconds at 375° at high pressure.
- When the timer sounds, open your press and peel your print immediately. Delayed peeling will cause the paper to stick.
- Place the blowout paper back over the printed fabric and press for another 10 seconds to seal the print.
Tips & Tricks:
- For a quick and easy project, or to personalize using a SG500, simply print and press the stocking cuff.
- If your stocking has a lining that is not heat resistant, stuff your stocking with heat-resistant padding or paper to prevent it from sticking together once pressed.